A MIDI controller turns visuals from something you set up into something you play: a pad fires the drop look, a knob rides the glitch, a fader sweeps the colour. Most controller guides are written for music producers and judge keys, drum pads and software bundles that visuals do not need. This guide picks controllers by what your hands should do on a screen, compares twelve of them on the things that matter for visuals, and shows how to map one in five minutes, with our free MIDI tester to check what it sends before you trust it at a gig.
Choose by what your hands should do, not by the logo
Visual control comes in three gestures, and each wants a different kind of control:
| Gesture | Best control | In a visual set |
|---|---|---|
| Fire a moment | Pads or buttons | Swap the clip, recall a whole look, trigger a freeze or a flash on the drop |
| Ride an amount | Knobs | Glitch strength, kaleidoscope, zoom, colour shift: anything you want to push and pull through a track |
| Set a level | Faders | A value you want to see at a glance: how much effect is in, how bright the picture is, a slow sweep across a breakdown |
So the first question is not which brand, but which gestures your set needs. A DJ adding visuals mostly fires moments, and a small grid of pads is enough. A visual artist who performs a whole set wants knobs and faders for the long moves and a few pads for the hits. Keys are rarely useful for visuals; a keyboard controller earns its place only if you also play music on it.
Three setups cover most people who ask:
- A DJ adding visuals. Eight pads and a few knobs next to the mixer: four looks, a freeze, the next image, and two or three effects to ride. A small pad-and-knob box does it, and it fits in the gap beside the decks.
- A visual performer with a full set. Knobs and faders for the long moves, plus a grid for the looks. That is often two boxes: an encoder controller on one side and a pad grid on the other.
- A phone or tablet rig on the move. USB-C and bus power, or Bluetooth and batteries, so the controller runs from the device without a wall socket. A small box beats a big one when it has to fit in a bag with everything else.
Where the usual advice goes wrong
The usual advice is to buy a Launchpad because every VJ tutorial shows one. A grid of 64 pads is excellent for firing clips and scenes, and poor at everything continuous: you cannot ride an effect with a pad, only switch it. Visual artists who start on a grid often end up adding a second box of knobs. Start from your gestures and you may need one controller instead of two.
Five things that matter more for visuals than for music
Music producers judge a controller on its keys, its drum pads and the software in the box. For visuals, five other things decide whether it works on the night.
- Class compliant, and said so by the maker. USB devices come in classes, and the computer loads one built-in driver for each class; a MIDI controller that follows the class needs nothing installed. That matters most on an iPad or iPhone, where you cannot install a driver at all. ImmerGround reads any class-compliant controller over USB-C or Bluetooth, so this is the first box to tick. Every controller in this guide is described by its maker as class compliant or driver-free, except where noted.
- Power and the right connector. A USB-C controller plugs straight into a USB-C iPad. An older USB-B, mini-USB or micro-USB controller needs Apple's USB-C to USB adapter ($19) and a cable. A Lightning iPad or iPhone needs the Lightning to USB 3 Camera Adapter ($39), and Apple says a controller that draws too much power needs the adapter's own power socket used or a powered hub. Novation's support pages say its Launchpads need a powered USB hub on an iPad, and Korg says the nanoKONTROL2 usually runs from the camera adapter without extra power but does not guarantee it.
- Velocity you can switch off. Velocity-sensitive pads make a light tap weaker than a hard hit. For drums that is the point; for firing a look on the drop it is a nuisance, because a soft hit fires a weak look. Some grids, such as the APC Mini MK2, have pads that are not velocity sensitive at all. In ImmerGround, the Fixed pad velocity setting makes every hit count as full strength whatever the pads send.
- Knobs that do not jump. A normal knob turns about 270 degrees and has a position. When a pad scene changes an effect and you then touch the knob, the value leaps to where the knob physically sits. Endless encoders have no start or end, so there is nothing to leap to. They are the calmer choice for riding effects live; check in the MIDI tester that turning one sends values from 0 to 127 rather than steps up and down, because some encoders can be set either way.
- Size and labels over lights. RGB pads look great in a photo, but their colours are set by the software talking to them, and a visual app that is not built for your model may leave them in a default state. Choose a controller you can play by position in a dark booth, and put a strip of tape with labels under the controls you use.
Twelve controllers at a glance
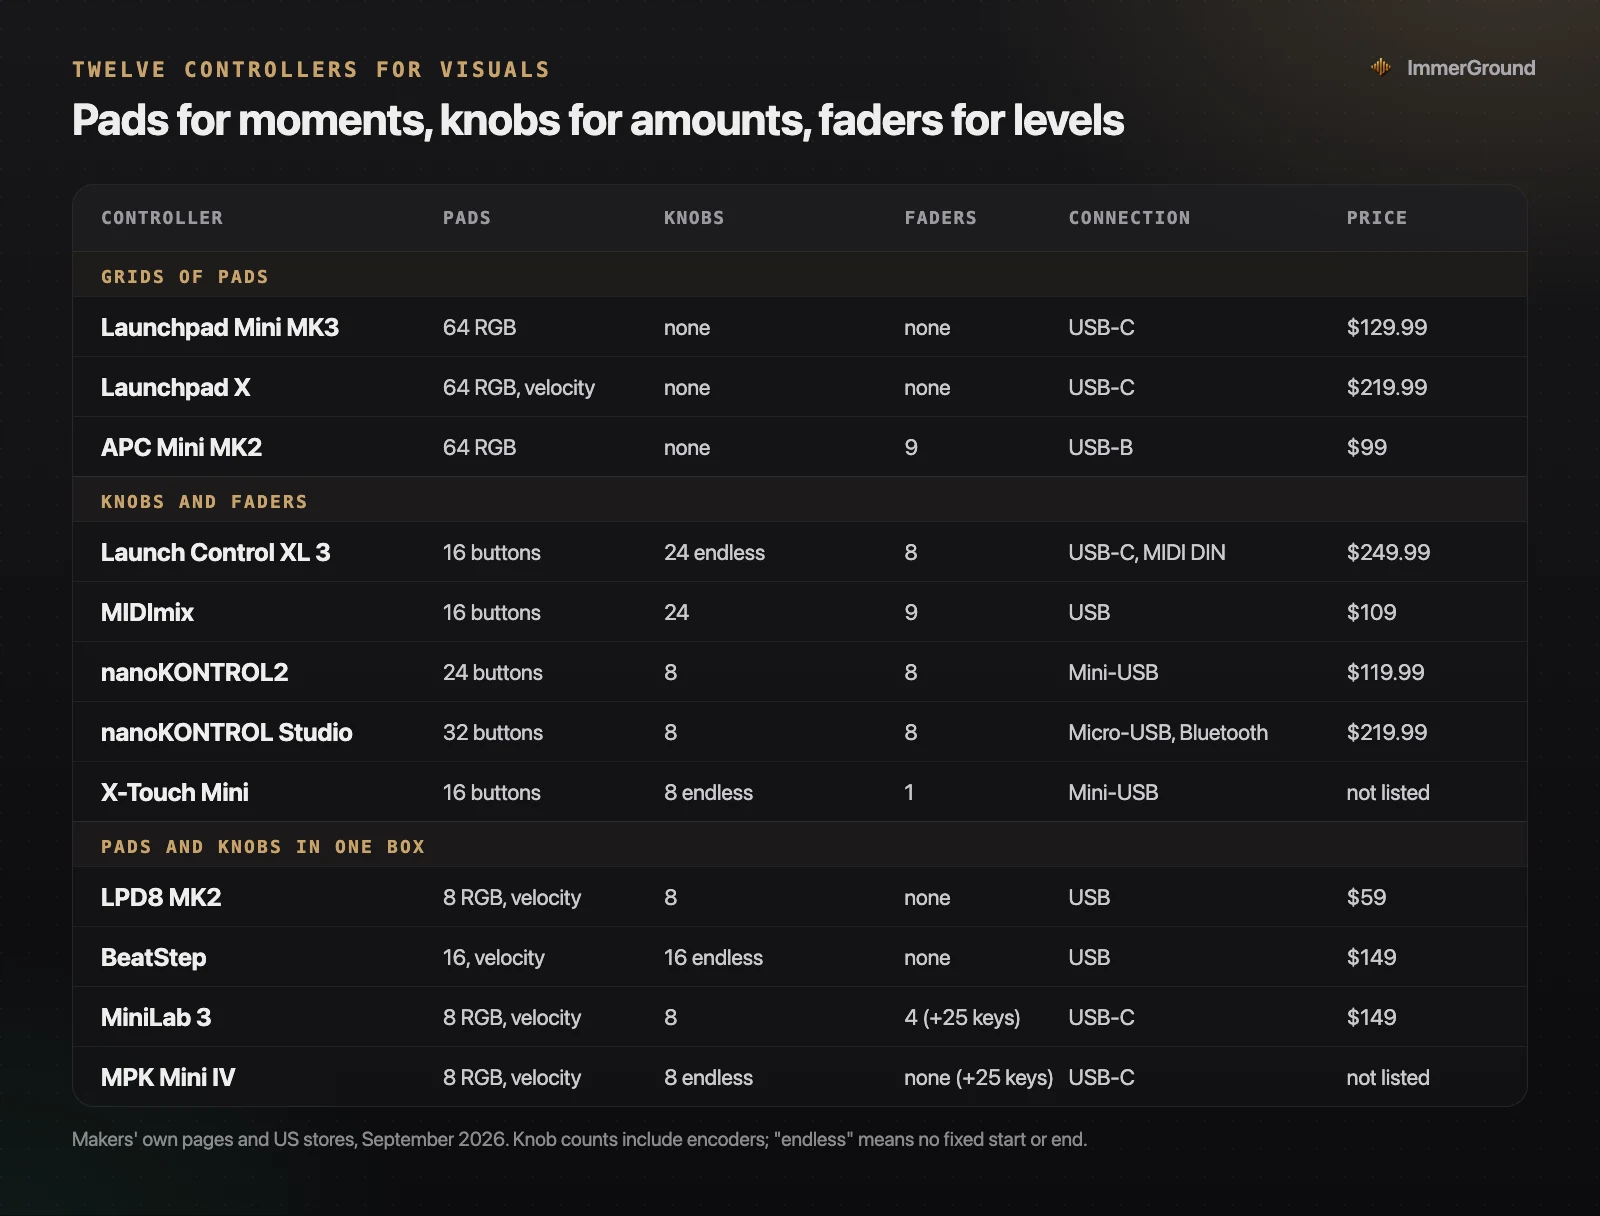
Prices are the makers' own US list prices or official store prices, checked in September 2026; shops often sell for less. Where a maker shows no price, the table says so. Every controller listed is on sale today.
| If you want | Start with | Why |
|---|---|---|
| The most for the least | Akai LPD8 MK2 ($59) | Eight pads for looks and eight knobs for effects, in a box that fits beside any mixer |
| A grid of looks with faders | Akai APC Mini MK2 ($99) | 64 pads that are not velocity sensitive, plus nine faders for levels |
| Riding many effects | Novation Launch Control XL 3 ($249.99) | 24 endless encoders and eight faders, with no jumping values |
| No cable to the controller | Korg nanoKONTROL Studio ($219.99) | The only one here with Bluetooth, and it runs on batteries |
| Visuals and music on one box | Arturia MiniLab 3 ($149) | Keys, pads, knobs and faders, USB-C, and Arturia says it connects to an iPad |
Grids of pads, for cutting between looks
A grid is the classic VJ controller: one pad per clip or per look, laid out so you can see the whole set under your hand.
Novation Launchpad Mini MK3
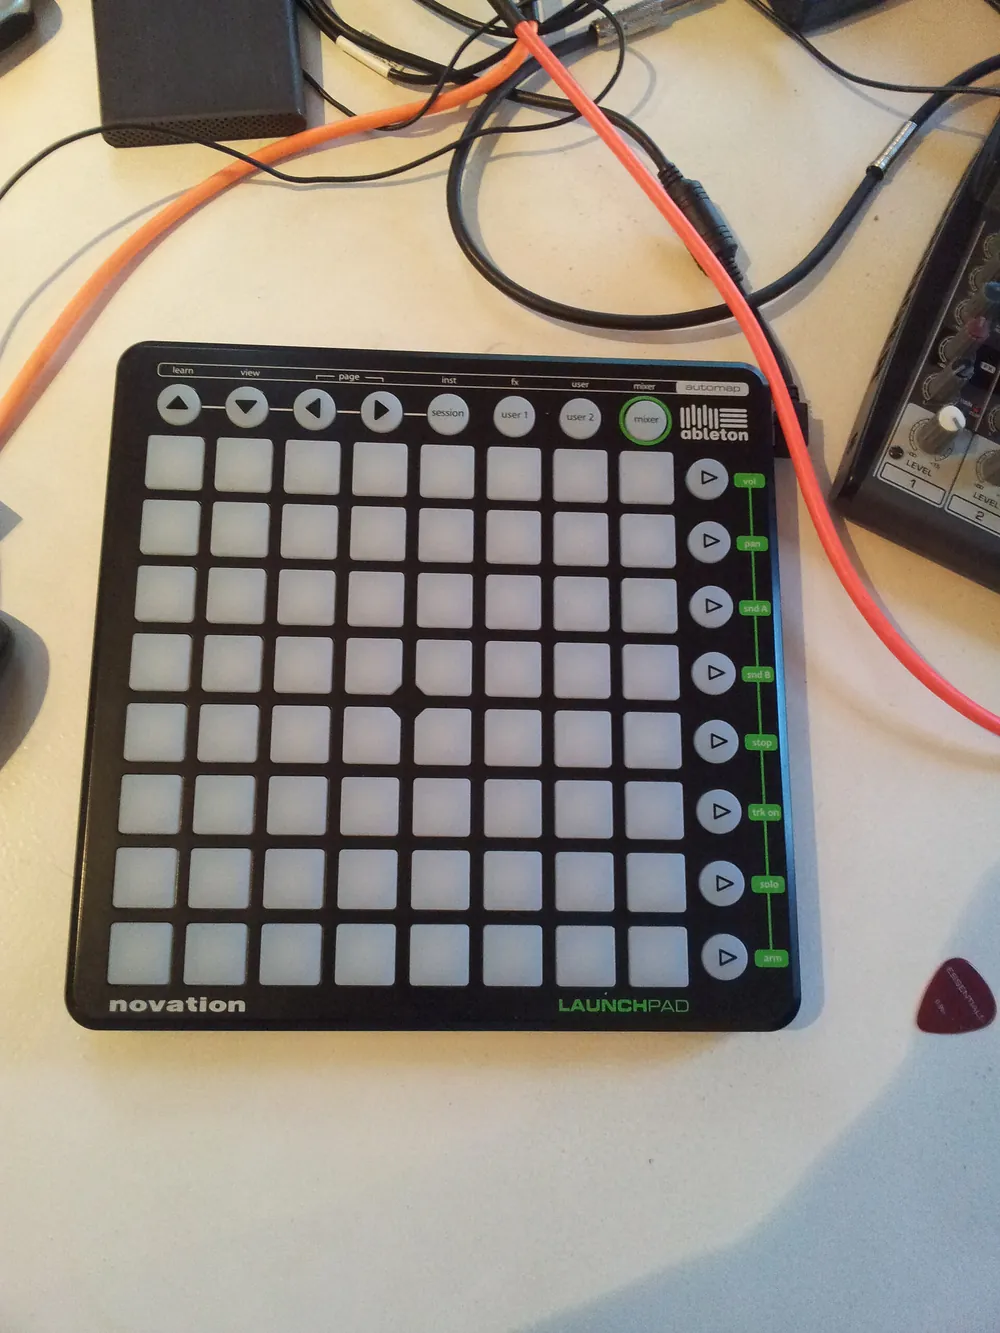
Sixty-four RGB pads and sixteen buttons in a small, bus-powered box with USB-C, described by Novation as plug and play, at $129.99. It is the grid most tutorials show, and it is enough for a whole night of looks if your set is mostly about firing moments. On an iPad, Novation's support page asks for a powered USB hub.
Novation Launchpad X
The same 64-pad grid with velocity-sensitive pads and polyphonic aftertouch, at $219.99, also USB-C and driver-free. The extra money buys expression that a drummer or a finger-drumming producer uses; ImmerGround reads notes, pads and CCs but not aftertouch, so for visuals alone the Mini does the same job.
Akai Professional APC Mini MK2
Sixty-four RGB pads, which Akai states are not velocity sensitive, plus eight channel faders and a main fader, for $99 in Akai's store. It connects with USB-B and is class compliant per Akai. For visuals it is the best value in the group: every pad hit is the same, and the faders give you levels you can see at a glance. Akai's own documentation names Windows and Mac, so try it on your iPad before a gig; a class-compliant controller should work, and the adapter and power notes above apply.
Knobs and faders, for riding effects
If your visuals are performed rather than fired, knobs and faders do most of the work: the glitch rising through a build, the kaleidoscope folding tighter into the drop, the colour sliding across a breakdown.
Novation Launch Control XL 3
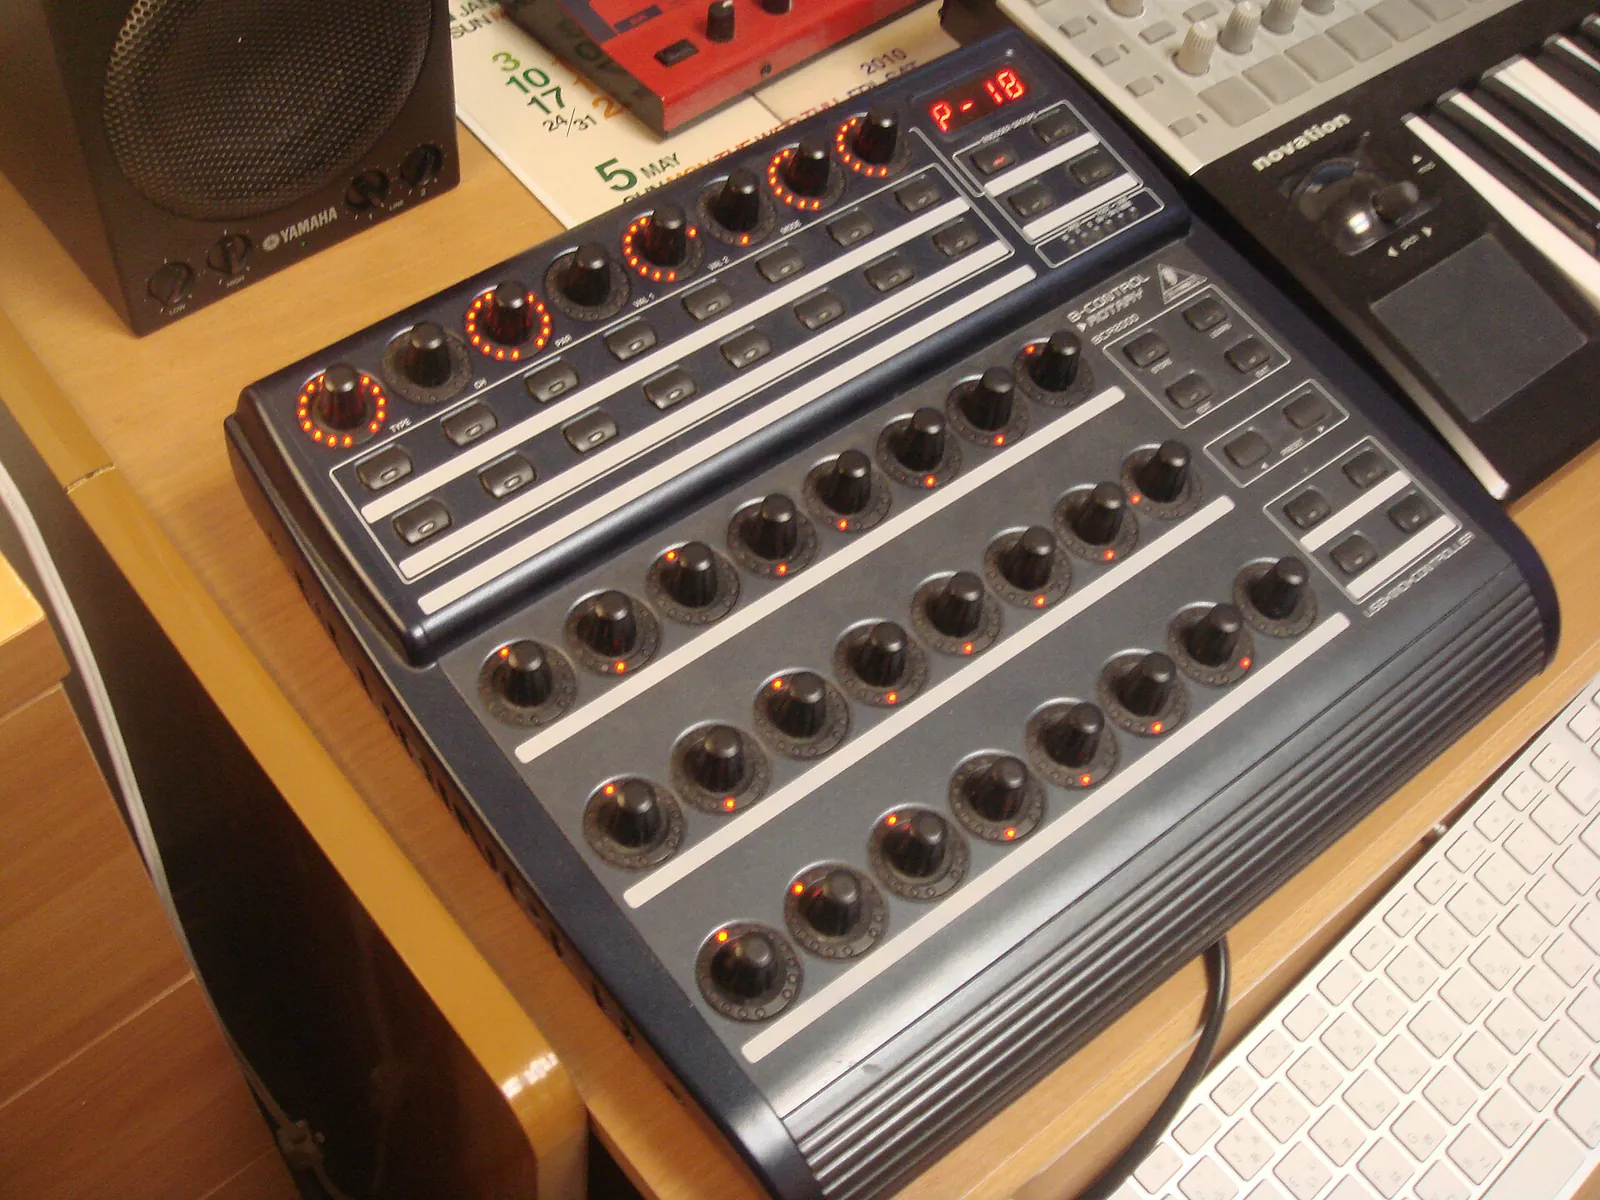
Twenty-four RGB endless encoders, eight 60 mm faders, sixteen buttons and a small screen, with USB-C and full-size MIDI ports, at $249.99. The encoders are the reason to buy it: no knob position to jump to after a pad scene changes a value. Novation's pages do not make an iPad or class-compliance statement for this model, so test it on your device first.
Akai Professional MIDImix
Twenty-four knobs, nine faders and sixteen buttons for $109, bus powered over USB. The knobs are the 270-degree kind, so values can jump after a scene change, but for the price it is the most controls per dollar in this guide.
Korg nanoKONTROL2 and nanoKONTROL Studio
The nanoKONTROL2 is a slim strip of eight knobs, eight sliders and twenty-four buttons, with mini-USB, at $119.99; Korg says it works with an iPad through Apple's camera adapter, usually without extra power, but does not guarantee it. The nanoKONTROL Studio has eight knobs, eight sliders, thirty-two buttons and a jog wheel, and adds Bluetooth LE MIDI and battery power, at $219.99. It is the only controller in this guide that needs no cable to the iPad, and ImmerGround reads Bluetooth MIDI controllers directly.
Behringer X-Touch Mini
Eight endless push encoders with LED rings, sixteen lit buttons and one fader, over mini-USB, class compliant by Behringer's own guide, which also describes connecting it to an iPad through Apple's camera adapter. Behringer lists no price on its site. The LED rings show each encoder's value, which helps in a dark booth.
Pads and knobs in one small box
For a DJ adding visuals, one small box with a few pads and a few knobs covers the whole job: pads for the drops, knobs for the two or three effects you ride.
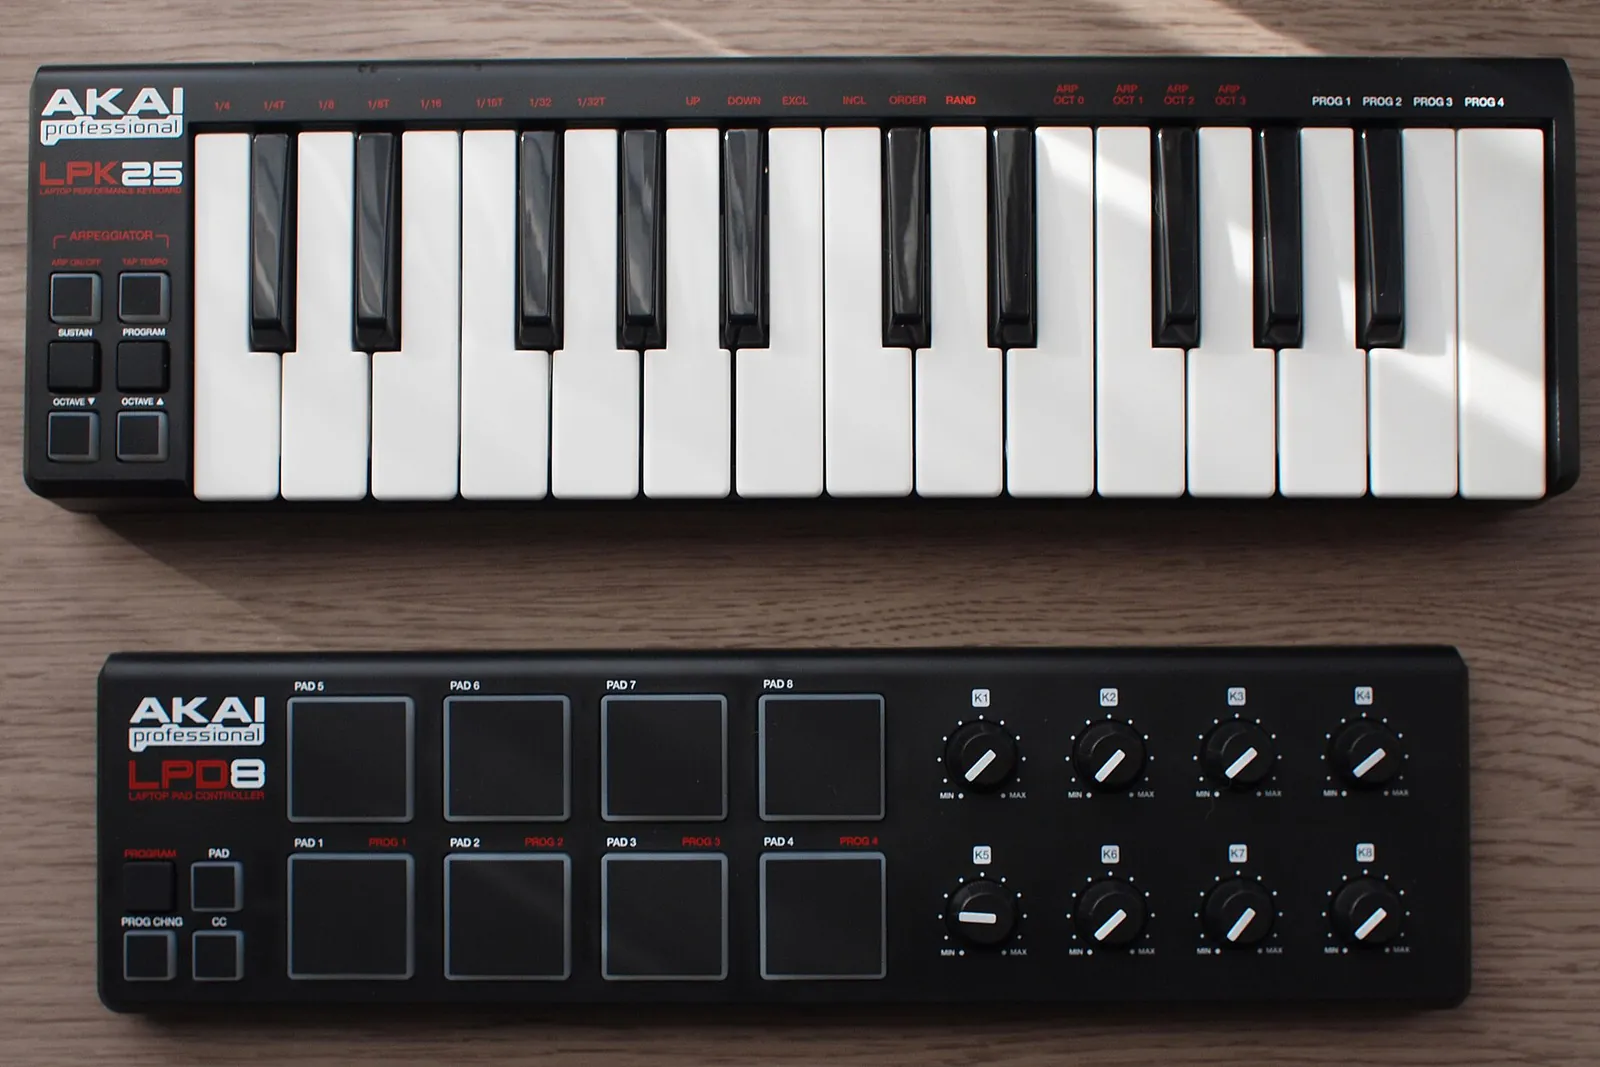
Akai Professional LPD8 MK2
Eight velocity-sensitive RGB pads, eight 270-degree knobs and four buttons, class compliant per Akai, for $59. It is the cheapest good answer in this guide: four pads for four looks, a freeze, the next image, and knobs for zoom, glitch and colour.
Arturia BeatStep
Sixteen velocity- and pressure-sensitive pads lit in red or blue, sixteen endless encoders and one large encoder, bus powered, which Arturia describes as class compliant for a laptop or an iPad; $149 in Arturia's US store. Sixteen encoders without a jump problem make it a strong effects surface with pads to spare.
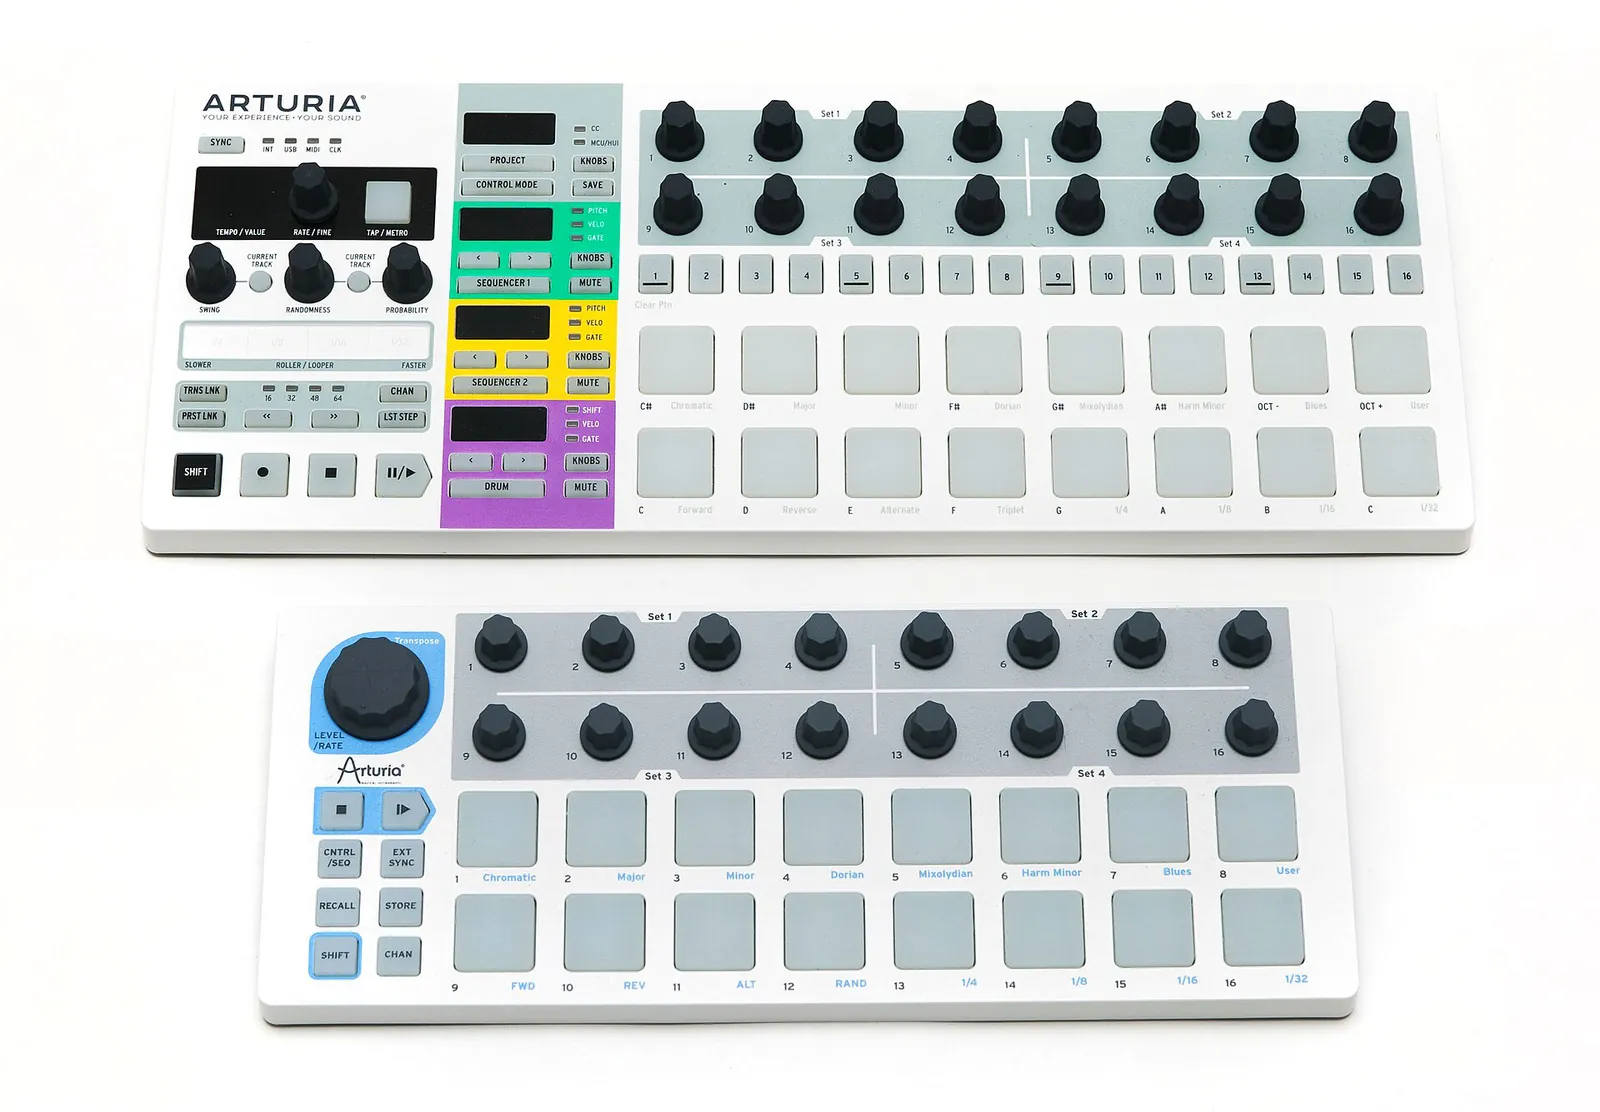
Arturia MiniLab 3
Twenty-five keys, eight RGB pads, eight encoders, four faders and two touch strips, with USB-C, class compliant, and Arturia says it connects to computers and iPads; $149. Pick it if the same box also plays music in your studio.
Akai Professional MPK Mini IV
Twenty-five keys, eight RGB pads that respond to velocity and pressure, and eight endless knobs, with USB-C, working with devices that support class-compliant MIDI per Akai's FAQ. Akai's store does not list its price. Like the MiniLab, it is a producer's controller first; for visuals only, the LPD8 MK2 gives you the same pads and knobs without the keys.
One controller or two
If you find yourself wishing a grid had knobs, or a knob box had pads, a second small controller usually beats one big one. ImmerGround listens to every connected controller at once, so a pad box for the looks and an encoder box for the effects can sit on either side of a mixer, each doing what it is good at. Start with one, play three gigs, and buy the second only when you know which gesture you are missing.
Map it in five minutes
Whatever you buy, mapping it should take minutes, not an evening. The routine that works:
- See what it sends. Plug the controller into a computer and open our free MIDI tester in Chrome, Edge or Firefox. Press every pad and turn every knob: it shows each note, each CC with its number and channel, pitch bend, and even MIDI clock. If a control sends nothing, you have found the problem before the gig instead of during it. If nothing shows up at all, our guide to fixing a MIDI controller that is not working goes through the cable, the computer and the software in order. No browser on iPhone or iPad supports Web MIDI, so do this step on a computer.
- Decide the map on paper. Four pads for four looks (warm-up, build, drop, closing), one pad for a freeze, one for the next image, three knobs for the effects you ride most. Fewer controls, used every time, beat a fully mapped surface you cannot remember.
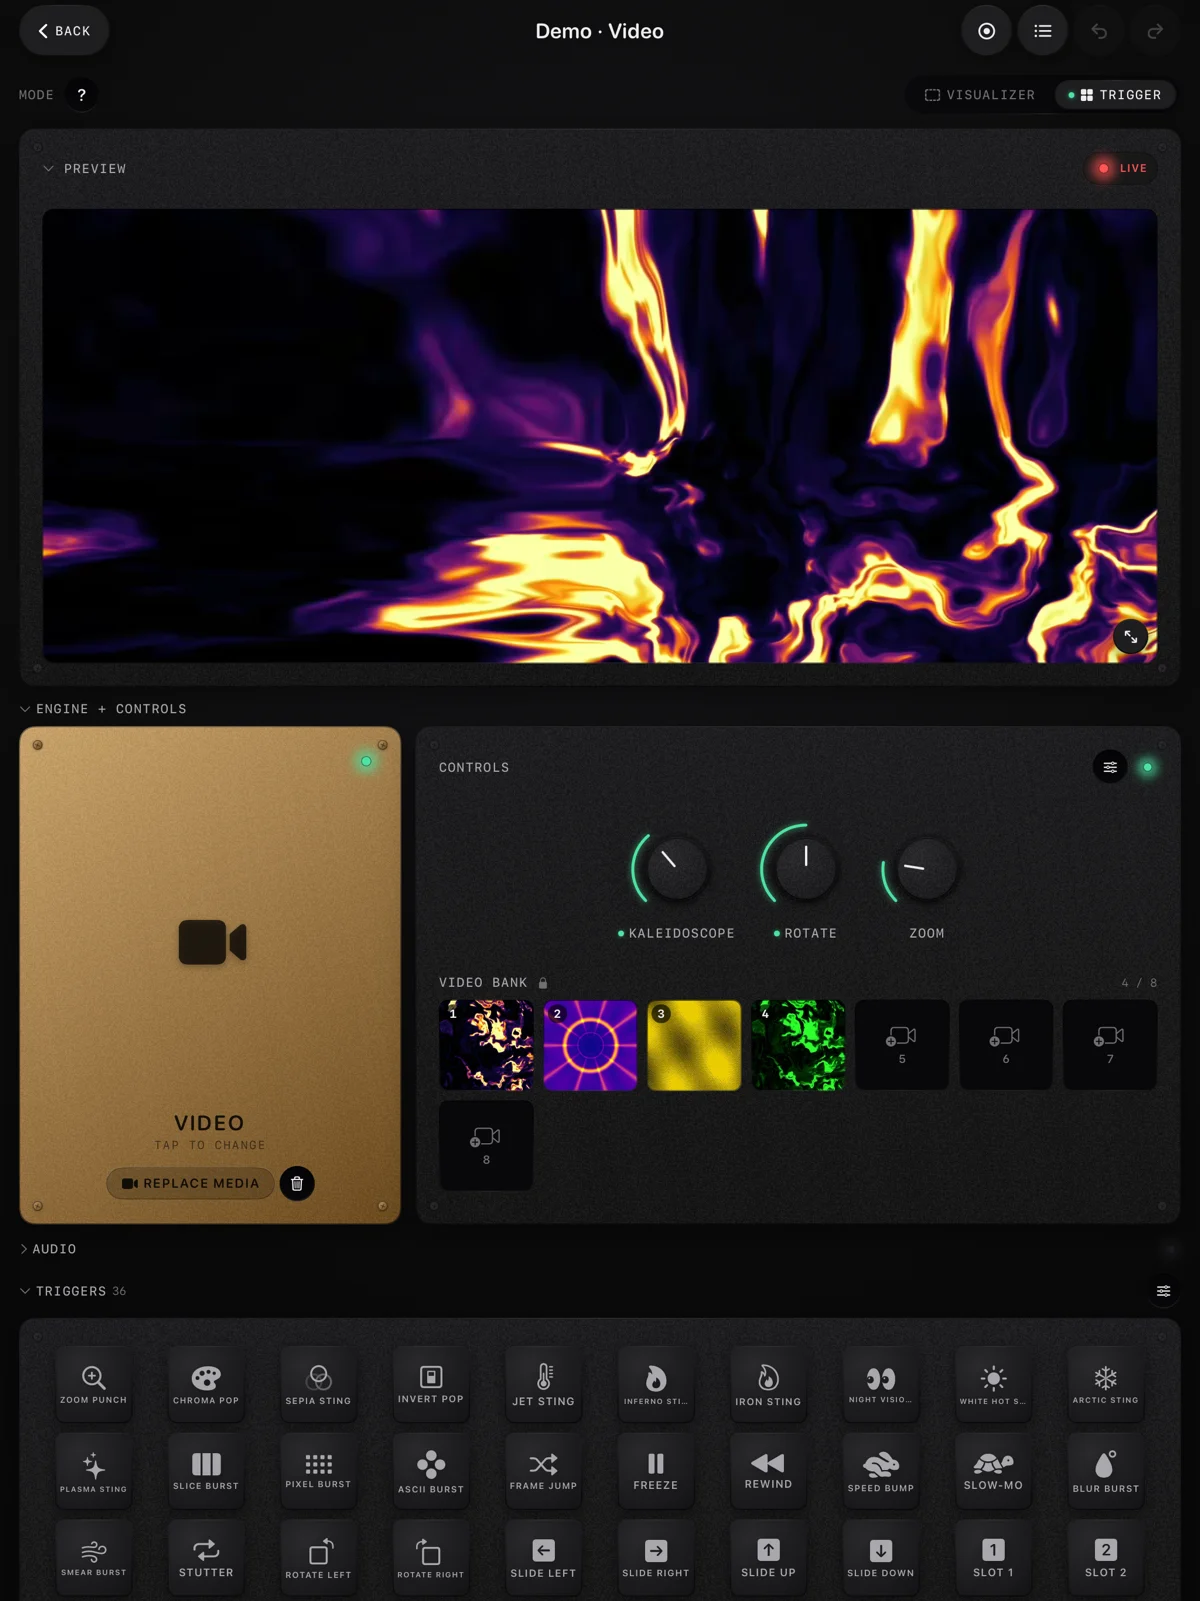
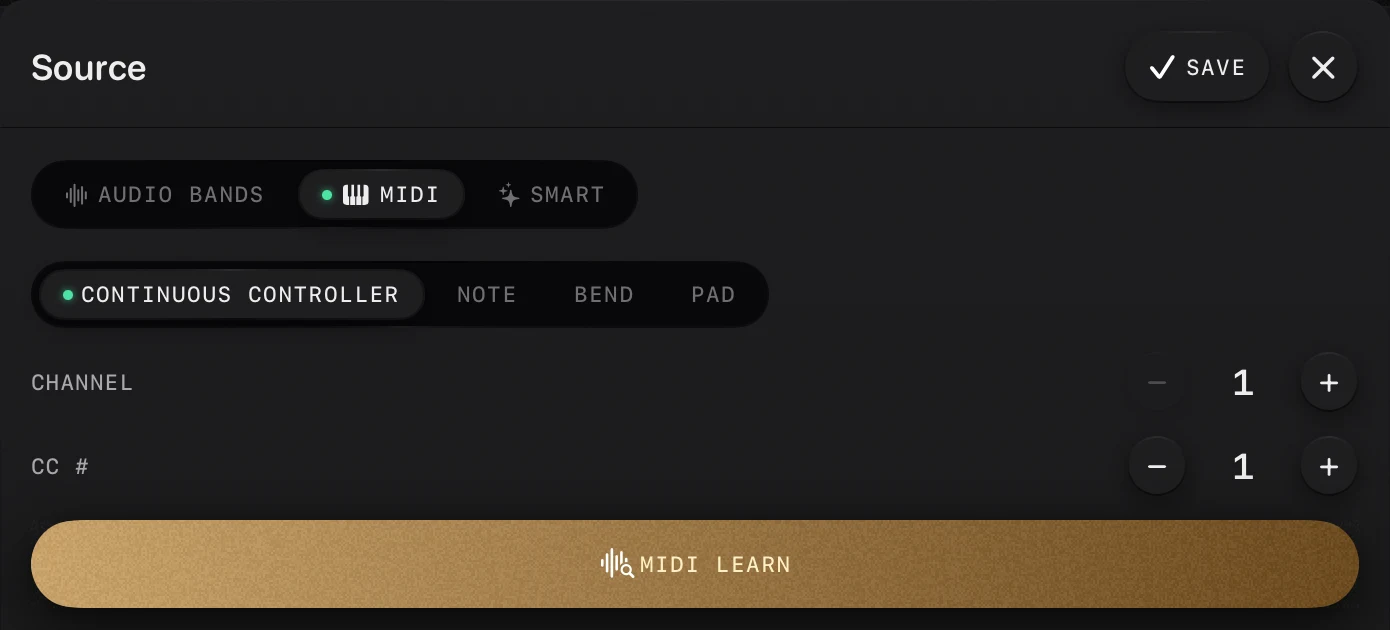
- Learn each control. In ImmerGround, open a mapping's source, choose MIDI, press MIDI Learn and move the control. The app catches it within 80 milliseconds and picks the most specific message, so a pad is read as a pad, not as the note under it. The label it shows, such as CC 74·ch1 or Pad 36·ch1, is the same one the MIDI tester shows.
- Set the curve and the range. A knob mapped to the full range of an effect is too much; set the maximum where the look still reads, and add smoothing so a nudge does not jump the picture.
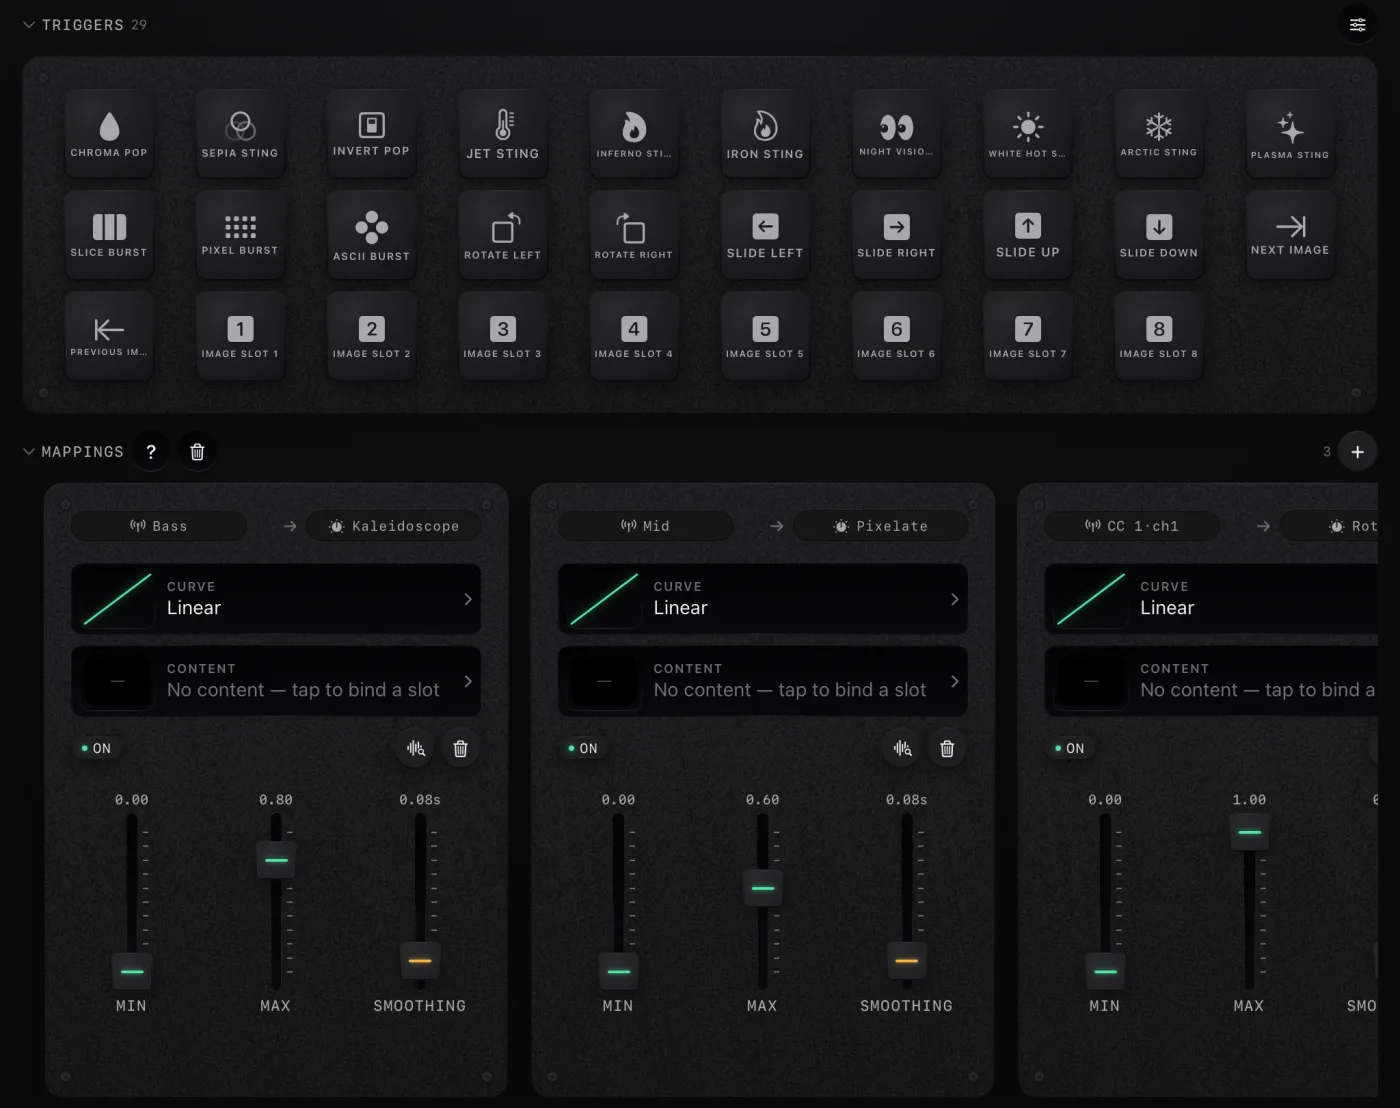
- Put the looks on pads. A pad scene snapshots every setting and recalls it in one hit. Build one per part of the night.
A starting map that fits any controller with at least eight pads and four knobs:
| Control | Mapped to | Why it earns the spot |
|---|---|---|
| Pads 1 to 4 | Four pad scenes: warm-up, build, drop, closing | One hit changes every setting at once, so the look follows the night without touching a knob |
| Pad 5 | Freeze | Holds the frame on a break; the most dramatic single effect you can fire |
| Pad 6 | Next image or next clip in the bank | Changes the picture on the downbeat of a new track |
| Pads 7 and 8 | A short flash and an invert | Accents for a snare roll or a drop, kept short |
| Knob 1 | Kaleidoscope or zoom amount | The long move through a build |
| Knob 2 | Glitch or RGB split amount | Texture that rises with the energy |
| Knob 3 | Colour shift | Moves the palette across a breakdown |
| Knob 4 or a fader | How far the bass pushes the picture | Lets you calm the whole screen for a quiet track without changing the look |
Everything else stays on the music: the mappings from the bass, the beats and the highs keep the picture moving between your hits, so the controller is for the moments, not for keeping the screen alive. If your music comes from Ableton Live, the notes in a MIDI clip can do the same job as your hands; our guide to visuals from Ableton shows how to route them.
Two details that save a night. If your pads send velocity and you want every hit to fire at full strength, ImmerGround has a Fixed pad velocity setting that ignores how hard you hit. And a mapping can be bound to a single device, which helps when two controllers send on the same channels.
When a controller does not show up
Almost every "my controller does not work" problem is one of five things, in this order:
- The cable carries no data. Many USB cables sold with phones and power banks are charge-only. If the controller lights up but nothing reaches the app, try the cable that came in its box.
- Not enough power. On an iPad or iPhone, a controller with bright pads can draw more than the port offers. Apple shows a message that the accessory uses too much power; the fix is a powered hub, or the power socket on Apple's USB 3 camera adapter.
- The wrong adapter. A USB-C iPad needs USB-C to the controller, or Apple's USB-C to USB adapter for an older plug. A Lightning device needs a camera adapter, not a charging adapter.
- A mode on the controller. Some controllers start in a mode that talks to one program and sends little to anyone else. Check the manual for a standard or user mode, then watch the MIDI tester while you press pads.
- The mapping, not the controller. If the MIDI tester shows the messages but the app does not react, the mapping is on a different channel or number. Delete it and use MIDI Learn again, so the app records exactly what the control sends.
Work through them at home, with the gig's cable and adapter, and the booth becomes the easy part.
Where to get it
- MIDI tester. Every note, CC, pad and clock tick your controller sends, with MIDI Learn that mirrors the app's. Free, in Chrome, Edge or Firefox on a computer; nothing leaves the machine.
- Free live audio visualizer. Try the effects you plan to map, with your mic or a song, in your browser. Free.
- ImmerGround. Map any class-compliant controller over USB-C or Bluetooth to any effect, put looks on pads, and play your footage live on iPhone, iPad or Mac. Free to download; ImmerGround Pro is $6.99 a week or $39.99 a year.
- Free VJ loops. Something to fire from the pads: 4K and 1080p loops at 120 BPM, CC0.
What to do next
- Write down your gestures: how many moments to fire, how many amounts to ride, how many levels to watch.
- Pick the smallest controller in the table that covers them, class compliant and bus powered.
- Test it in the MIDI tester the day it arrives, every control.
- Map five things, not fifty: four looks and a freeze on pads, three effects on knobs.
- Rehearse without looking until your hand finds the drop pad by feel.
- Take it to a gig with a spare cable. If you play behind a DJ, our guide to visuals for a DJ set puts the controller in context.