You finished a track and you want a video to post with it: something that moves with the music, looks like you and not like a template, and costs nothing. Most "free" visualizer makers stamp a watermark on the export, upload your unreleased song to someone's server, or hand you the same bouncing bars as thousands of other uploads. This guide covers what makes a visualizer video worth watching, the four ways to make one and what each really costs, a ten-minute walkthrough in your browser with no upload, the three mappings that make it look edited, the right frame for YouTube, Shorts, Reels, TikTok and Spotify Canvas, and what to do when sixty seconds is not enough.
A good visualizer video is your song made visible, not a screensaver
Strip any music visualizer down and it is one idea: something measured in the sound drives something in the picture. The measured things are few. The bass, the mids and the highs are the energy in three frequency bands. The overall loudness rises and falls across the song. The beats and transients are the moments where a kick or a snare hits. The picture things are many: zoom, rotation, colour, a glitch, a flash, a cut to the next image. A visualizer is a set of connections between the two, each with a curve and a range that decide how hard the picture reacts.
Everything that makes one video better than another comes from three choices:
- The picture. Your own clip, your cover art or a photo from the shoot reads as yours. A stock spectrum over a gradient reads as a template, because it is one.
- The connections. Three well-tuned ones look edited. Ten loose ones look like a broken television.
- The frame. A vertical video made for a phone, cut to the fifteen seconds that carry the hook, beats a horizontal full-length upload that nobody finishes.
Where the usual advice goes wrong
The advice you find first is to pick a template: a circular spectrum, a waveform bar, your title in the middle, done. It is quick, and it is exactly why so many visualizer videos get skipped. The template is the same one the last hundred uploads in your feed used, and the eye learns to ignore it in about a second. Worse, a spectrum shows the sound; it does not show the song. A listener already hears the bass. What keeps them watching is a picture that belongs to this track, doing something on the beat they were waiting for.
So this guide starts from your picture and adds movement to it, rather than starting from bars and adding your name.
Four ways to make one, and what each really costs
There are four routes, and the price on the page is rarely the whole cost. The table sums them up; the details follow.
| Route | Free version | Your song goes | Best for |
|---|---|---|---|
| Our browser visualizer | A small immer ground mark, up to 60 seconds, up to 1080p, 16:9, 9:16 or 1:1 | Nowhere: it all runs in your browser | Shorts, Reels, TikToks, teasers and Canvas loops made from your own picture |
| The ImmerGround app | Free to download; Pro is $6.99 a week or $39.99 a year | Nowhere: it runs on your iPhone, iPad or Mac | The whole song, rendered again up to 4K, played by hand with a MIDI controller |
| Online template makers | Usually a watermark and 720p on the free plan | Uploaded to the service's servers | A quick spectrum or waveform over a background, if you do not mind the look being shared |
| A video editor or motion software | Depends on the software | Stays with you | Full control, if you have the skills and the evenings |
What the online makers give you for free
We checked the free plans of five popular online visualizer makers on their own pricing and help pages in September 2026. The pattern is consistent: the free plan exports at 720p with a watermark, and the song is uploaded and rendered on their servers.
- Specterr. Free: one video a day, 720p at 30 frames a second, up to five minutes, with a watermark, and the video expires after ten days. Exports are rendered on its servers. Pro is $29 a month, or a single watermark-free video from $14.99.
- Renderforest. You upload your file into one of its music visualization templates. Free exports are 720p with a watermark; 1080p needs a paid plan, and its cheapest plan, Lite, is $8 a month billed yearly and still exports templates at 720p.
- VEED. Its music visualizer is free to use, but free exports carry a watermark, are 720p only and can be up to ten minutes long, and rendering happens on its servers.
- Kapwing. Free exports carry a watermark, run up to four minutes at 720p, and share a 30-minute monthly limit; processing happens in the cloud. Its visualizer page also says exporting that tool needs Pro, which is $24 a month or $16 a month billed yearly.
- Videobolt. You can preview for free, but downloading needs a subscription; the cheapest, Lite, is $9.99 a month billed yearly and exports 720p at 24 frames a second.
General editors such as Canva and Adobe Express cut video to music well, and Canva can place cuts on the beat, but neither lists a visualizer that reacts to the sound on its own. They are good for putting a finished visualizer clip into a wider edit.
The honest trade
Online makers give you more ready-made styles than a browser tool, and some go longer than sixty seconds for free, with a watermark. What you give up is your song leaving your computer before release, a watermark or a monthly fee, and a look someone else is also using. For a short clip made from your own picture, the free browser route has no catch; for the full song, the app is the route without a watermark or an upload.
Prepare the song and the picture before you open anything
Ten minutes of preparation saves an hour of redoing takes.
The song
- Use a file you own. Export a WAV or a high-quality MP3 of the final master. Loading the file, rather than playing the song out loud into a microphone, gives the cleanest signal: no room noise, and the same drop hits the same way on every take.
- Pick the section first. For a Short, a Reel or a TikTok, choose the fifteen to thirty seconds that carry the hook or the drop and start one bar before it. For YouTube, decide whether you want the whole song or a teaser.
- Know the tempo. If you plan cuts or want to start a take exactly on a bar, the tempo helps. Our free BPM finder reads it from the file in your browser, with the key and its Camelot code, and nothing is uploaded. If the key is what you need, our guide to finding the key of a song covers it by ear, from the chords and with the free key finder.
The picture
- Something with edges and contrast. A performance clip, city lights, water, a face, the cover art. Effects show on highlights and lines; on flat colour they barely register.
- Shot for the frame you will post. A vertical phone clip fits a 9:16 video without cropping. A horizontal clip in a vertical frame loses most of its width.
- Short is fine. Ten to thirty seconds of footage is plenty; it loops under the music.
- No footage at all? A single photo works well with zoom and colour moves. Our free VJ loops are another option: 4K and 1080p, 16 seconds each, CC0, so you can use them in a release video without asking anyone.
Make it in your browser in ten minutes
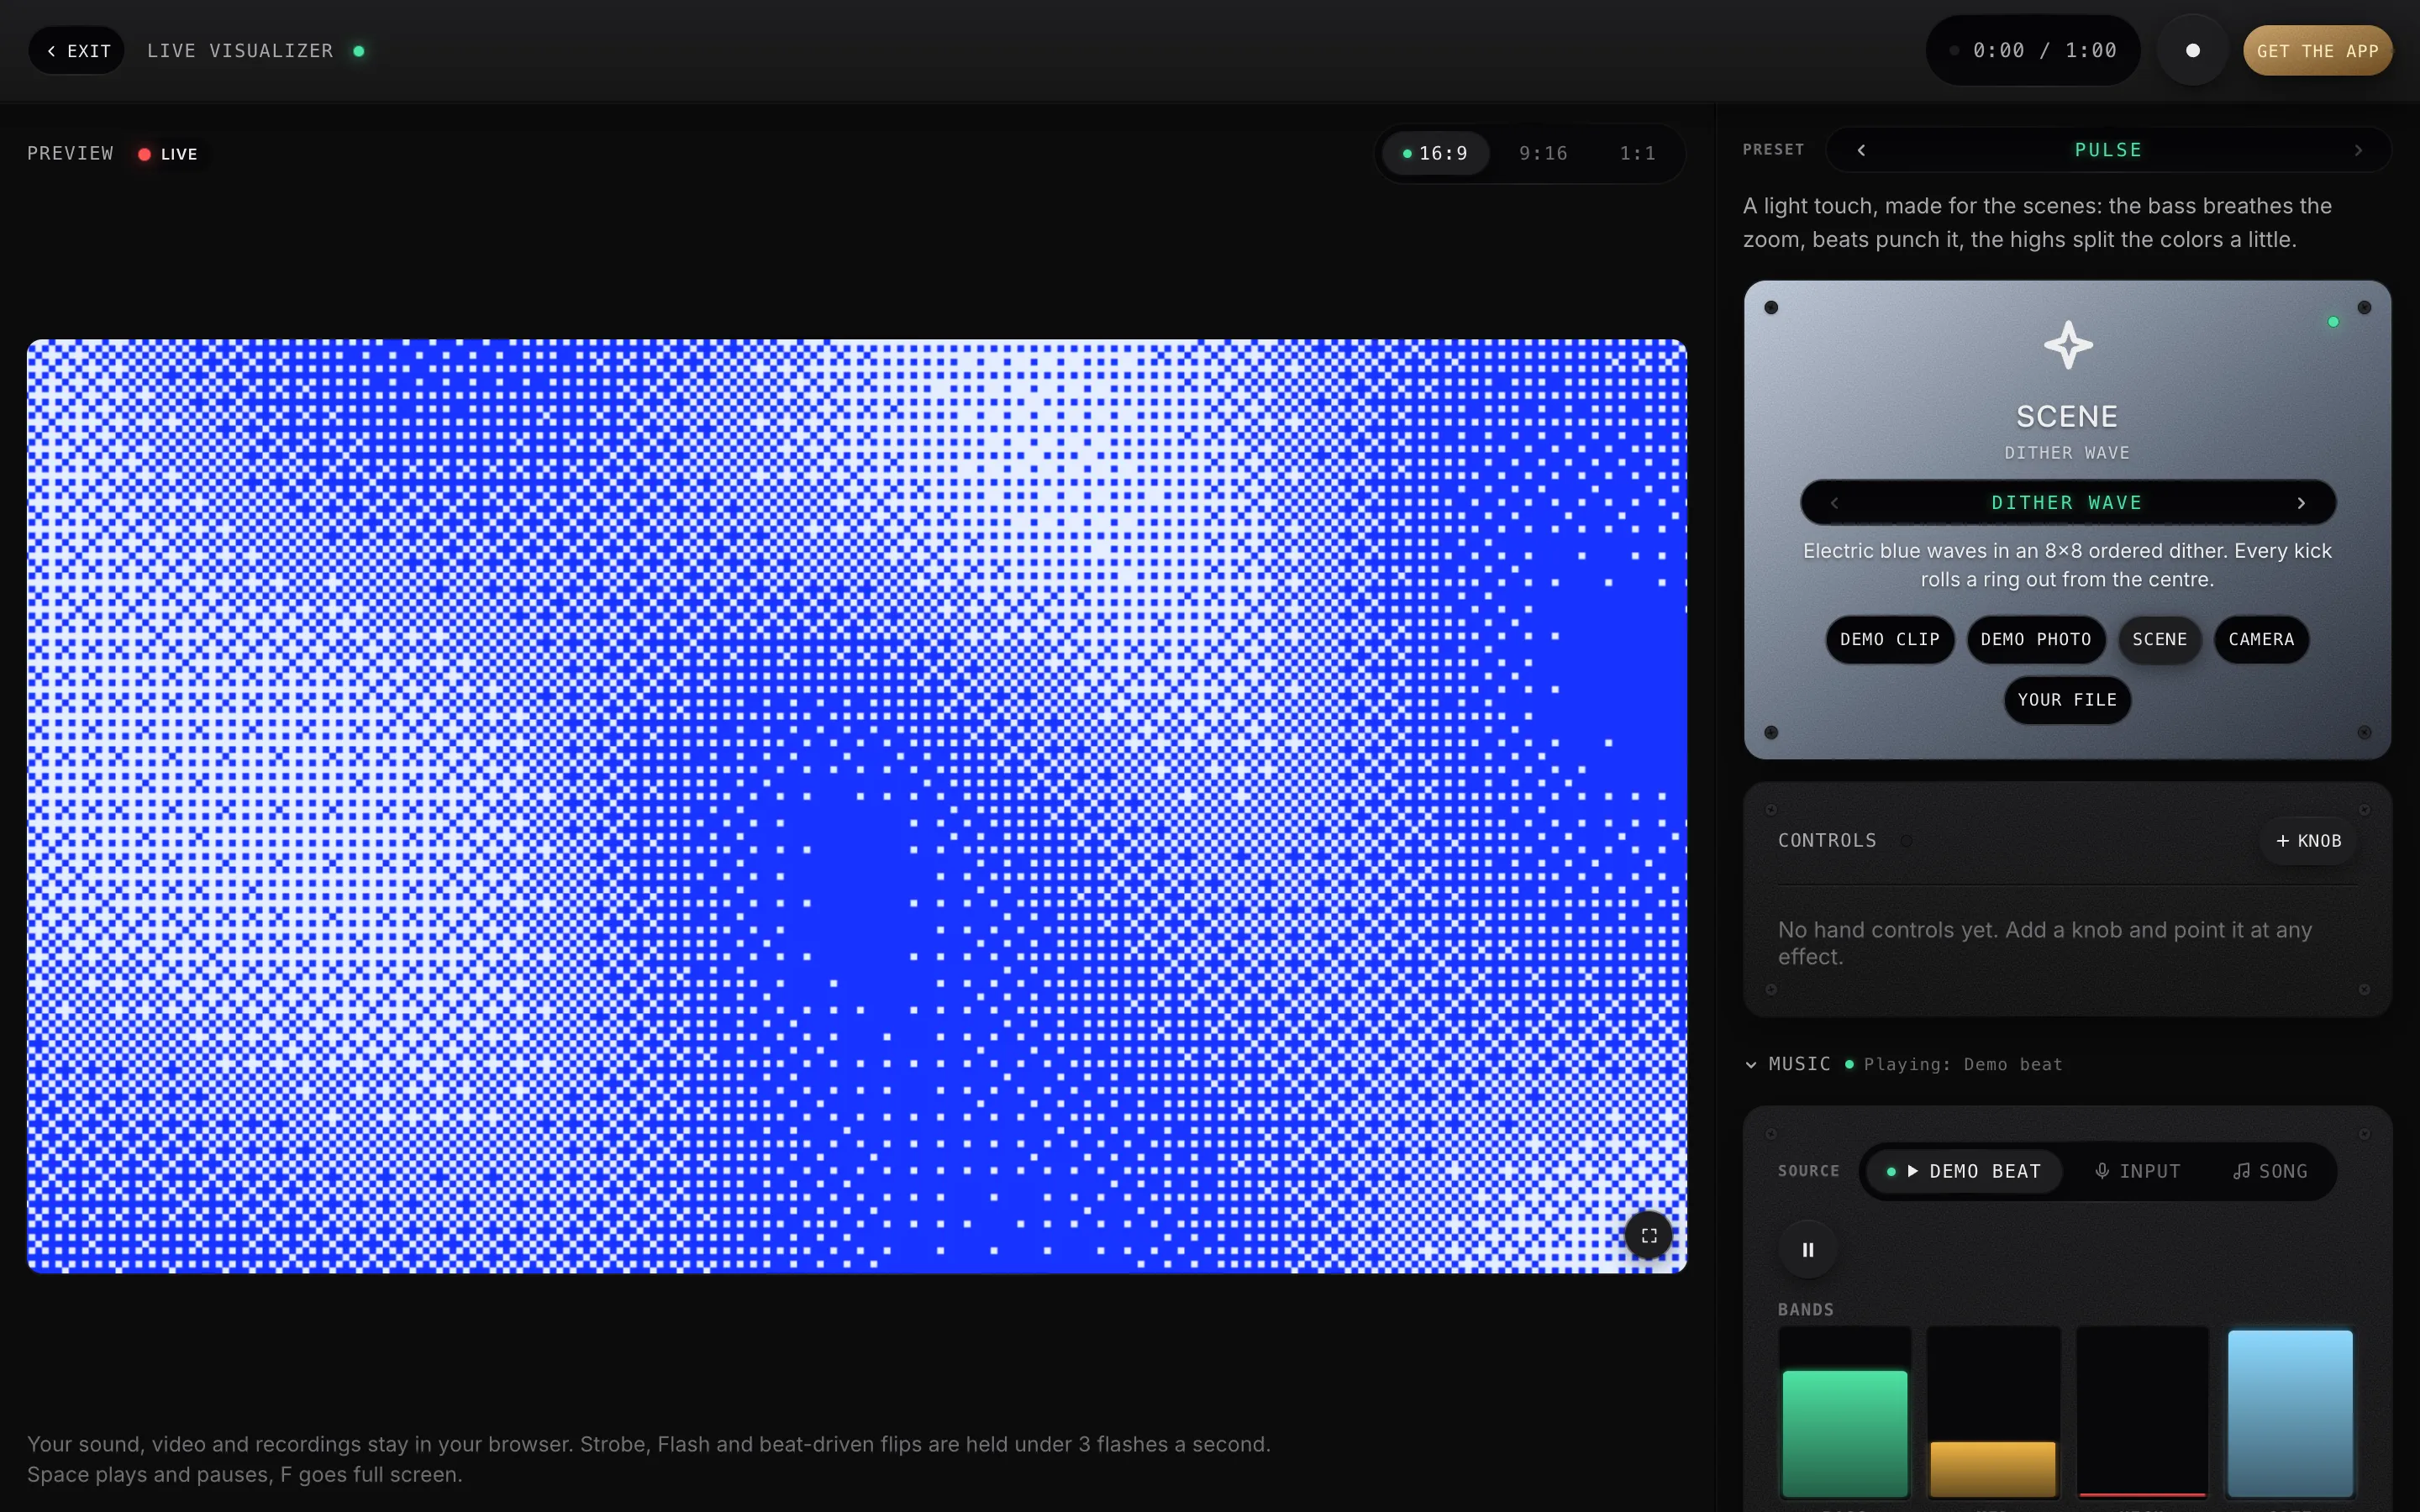
Our free live audio visualizer runs entirely in the page. It uses the same analysis and the same effect chain as the ImmerGround app, your files never leave your device, and the video it records carries only a small immer ground mark in the corner.
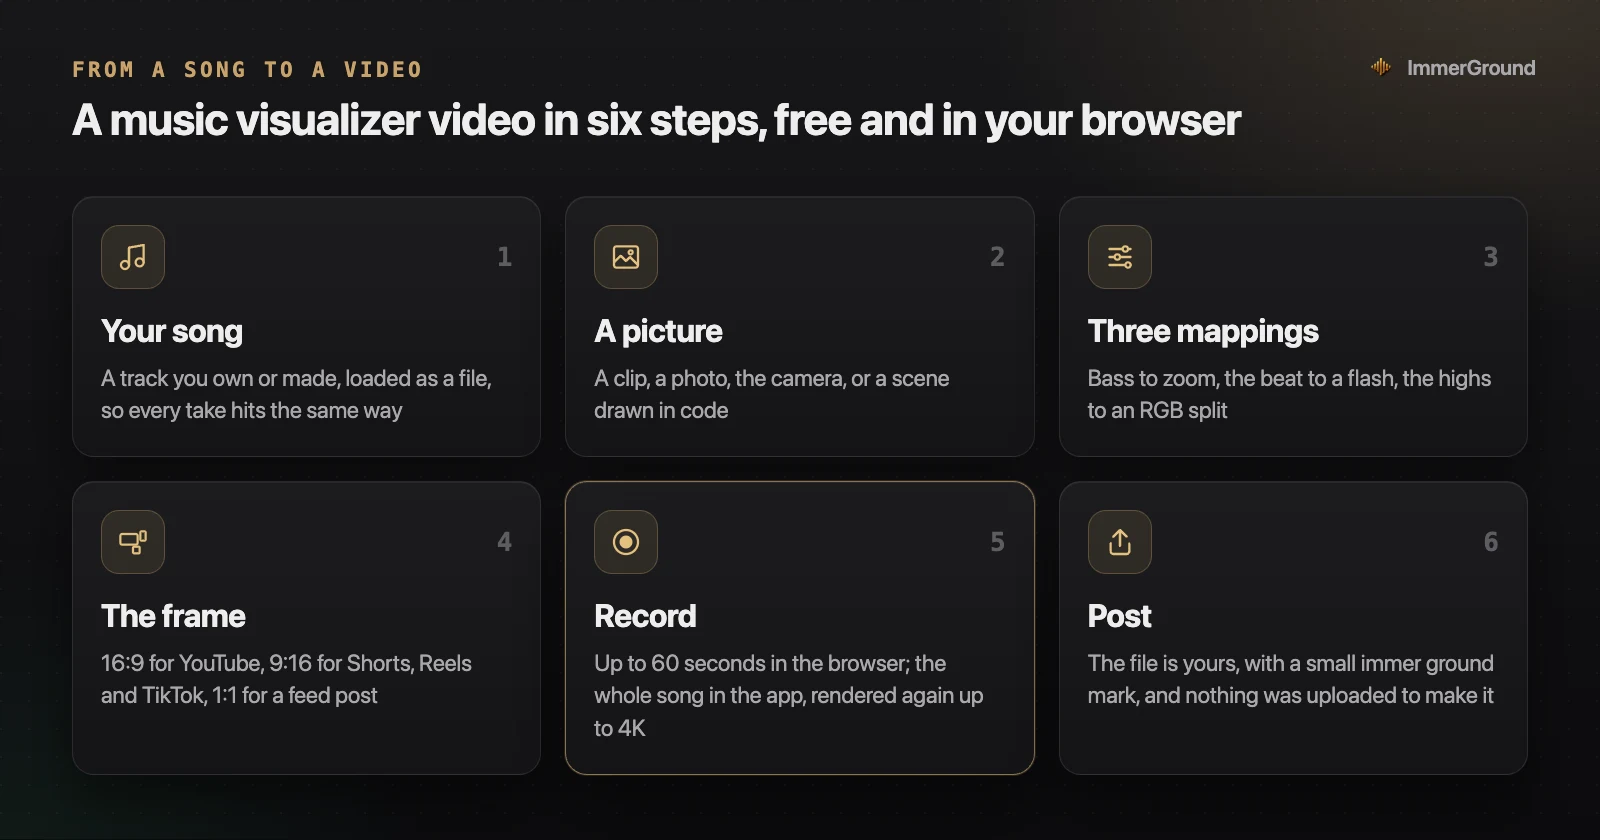
- Open the visualizer. Go to the visualizer and press Open the visualizer. It runs full window; F makes it full screen and Space plays or pauses.
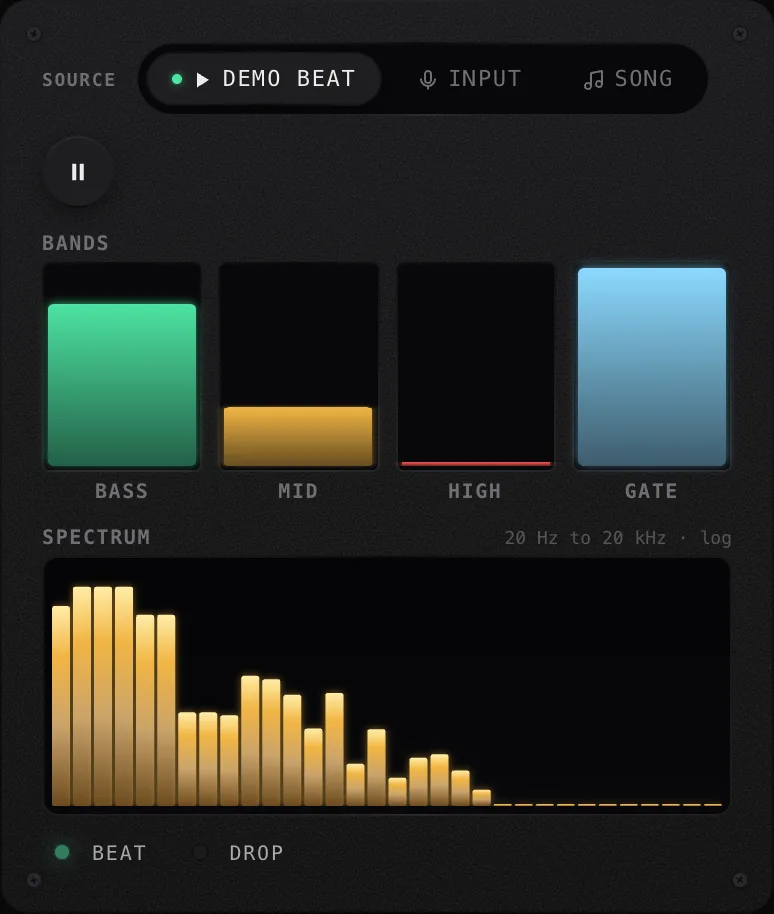
- Load your song. In the Music panel, choose Song and pick your file. It appears in a small CD player with a progress bar you can click to jump to the section you chose.
- Load your picture. In the picture tile, choose Your file for a clip or a photo. Demo clip, Demo photo, Camera and Scene are there too; the scenes are patterns drawn in code, such as Dither wave and Contour map, that move with the music by themselves.
- Start from a preset. The preset strip holds seven starting points, including the demo project that ships inside the app. Pick one close to the mood you want, then change it.
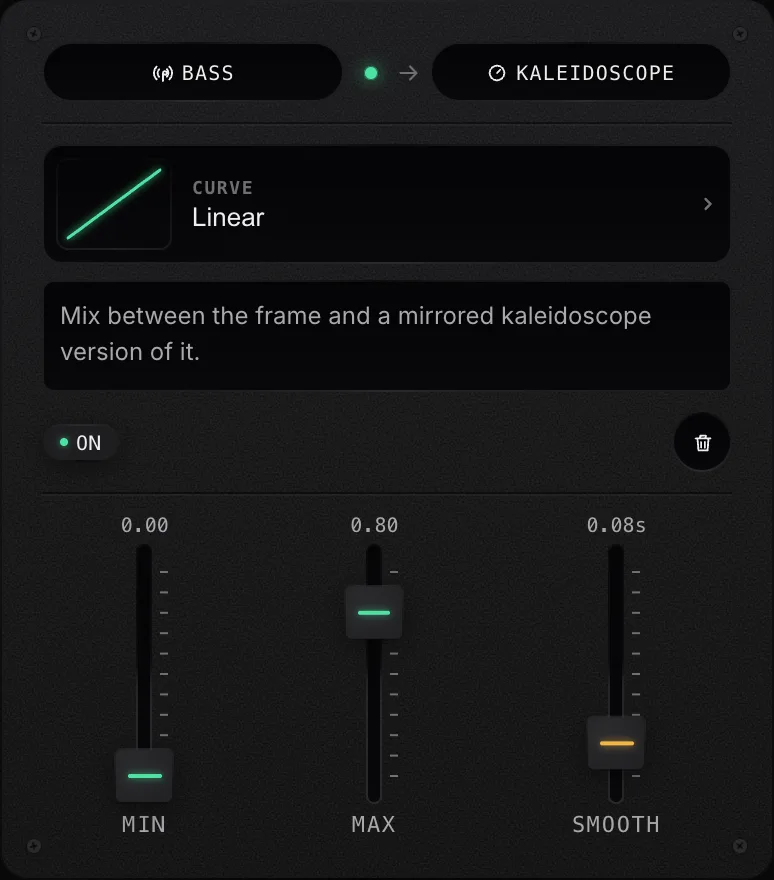
- Tune the mappings. Every row is a source (Bass, Mid, High, Level, Gate, Energy, Beat, Drop or a knob) pointed at an effect, with a curve and minimum, maximum and smoothing faders. The next section has the three rows to build.
- Choose the frame. Above the picture, pick 16:9, 9:16 or 1:1.
- Record. Jump the song to one bar before your section, press Record a video, then play. The timer counts up to 1:00 and the take stops by itself at sixty seconds, or when you press Stop recording.
- Download. The take opens in a sheet with its size, length and format. Press Download. The file is MP4 where your browser can write it and WebM where it cannot, with your song's audio in it.
Two details worth knowing. On a desktop computer the take is recorded at 1080p; on a phone or a lighter laptop it is 720p, so make your final take on the bigger machine. And because everything runs in the page, an unreleased song stays on your computer: nothing is sent anywhere to make the video.
The three mappings that make it look edited
This is where a visualizer video stops looking automatic. Build these three rows, play your section, and tune until the picture rests between hits and moves on them.
| Mapping | What it does | Settings that matter |
|---|---|---|
| Bass to zoom | The frame pushes in on the low end and settles between kicks. The breathing everyone recognises. | Keep the maximum small, a few percent. Raise the smoothing until the push glides instead of jumping. |
| Beat to a flash or a freeze | A hit on every kick: a short flash, a held frame, or a jump to the next image. This is what makes an unedited clip feel cut to the music. | It is a trigger, so it needs a short decay. Long flashes read as a fault, and fast strobing is hard on some viewers (see below). |
| High to RGB split | Hi-hats and vocals pull the colour channels apart for a moment, then snap back. | Use a steeper curve so it stays quiet until the top end really moves. |
If the picture never rests, your ranges are too wide or your smoothing too low. If it barely moves, the curve is the problem: a linear curve on the bass reacts to everything, a steeper one reacts to the hits. Only when those three rows work, add a fourth: loudness to a slow colour shift across the song, or a kaleidoscope on the bass if the track wants something more abstract.
A word on flashing
The W3C's accessibility guidelines (WCAG 2.2, criterion 2.3.1) ask that nothing flashes more than three times in any one second, unless the flash is small and dim enough to stay under its thresholds, and warn that flashing content can cause migraines, dizziness, nausea and seizures. Spotify's Canvas guidelines also tell artists to avoid intense flashing graphics. Our browser visualizer holds every flash and trigger to three a second and runs its strobe at 2.5 flashes a second, and a viewer's reduced-motion setting turns strobe and flash off. Keep your own edits inside the same limit: a short flash on the kick reads as rhythm, a fast full-screen strobe reads as a warning sign.
Pick the frame for where the video will live
Record one take per shape rather than cropping one video to fit everything. These are the specs the platforms publish on their own help pages, checked in September 2026:
| Where | Shape and size | Length | Which take |
|---|---|---|---|
| YouTube | 16:9, recommended sizes up to 3840 by 2160 | The whole song | A 16:9 teaser from the browser, or the whole song from the app rendered at 1080p or 4K |
| YouTube Shorts | Square or vertical | Up to three minutes | A 9:16 take of the hook, up to 60 seconds in the browser |
| Instagram Reels | Between 1.91:1 and 9:16, at least 30 frames a second and 720 pixels | Up to 20 minutes, but Reels over three minutes are not recommended to new audiences | A 9:16 take of the hook |
| TikTok | Vertical 9:16, the shape TikTok's own ad specs recommend | Uploads up to 60 minutes | A 9:16 take of the hook |
| Spotify Canvas | Vertical 9:16, 720 to 1080 pixels tall, MP4 | 3 to 8 seconds | An 8-second 9:16 take, scaled down to 1080 pixels tall |
| A feed post | 1:1 fits every feed | Short | A 1:1 take |
Two notes on the table. The browser records at 30 frames a second, which meets Instagram's minimum. And a Canvas has an upper limit on height: a 9:16 take is 1920 pixels tall from a fast desktop and 1280 from other devices, both over the limit, so scale it to 1080 pixels tall in any video app before you upload it to Spotify for Artists. Spotify's Canvas policy also rules out links, ticket sellers and requests to follow you on social media, so keep text off it.
When sixty seconds is not enough: the whole song in the app
The browser version is built for clips: a hook for a Short, a teaser, a Canvas. For a full-length YouTube upload, or a video you want to play by hand, the ImmerGround app does the same job without the time limit. Our guide to making a music visualizer for YouTube covers the upload settings, Content ID and the other ways to render a whole song.
- The whole song, recorded. Every session records a real-time MP4 of the output along with a timeline of every signal and every change, and the file you share carries the sound.
- Rendered again up to 4K. Because the timeline is saved, Render HD makes the session again at 720p, 1080p, 1440p or 4K, at 30 or 60 frames a second, so a take made on a phone can come out at a size fit for YouTube.
- Played by hand where it matters. Plug in any class-compliant MIDI controller over USB-C or Bluetooth and put the chorus on a pad: a pad scene snapshots every setting and recalls it in one hit, so the drop gets its own look.
- Kept on the subject. Motion tracking locks onto the person in a performance clip and keeps the effects on them as the camera moves, which a template cannot do.
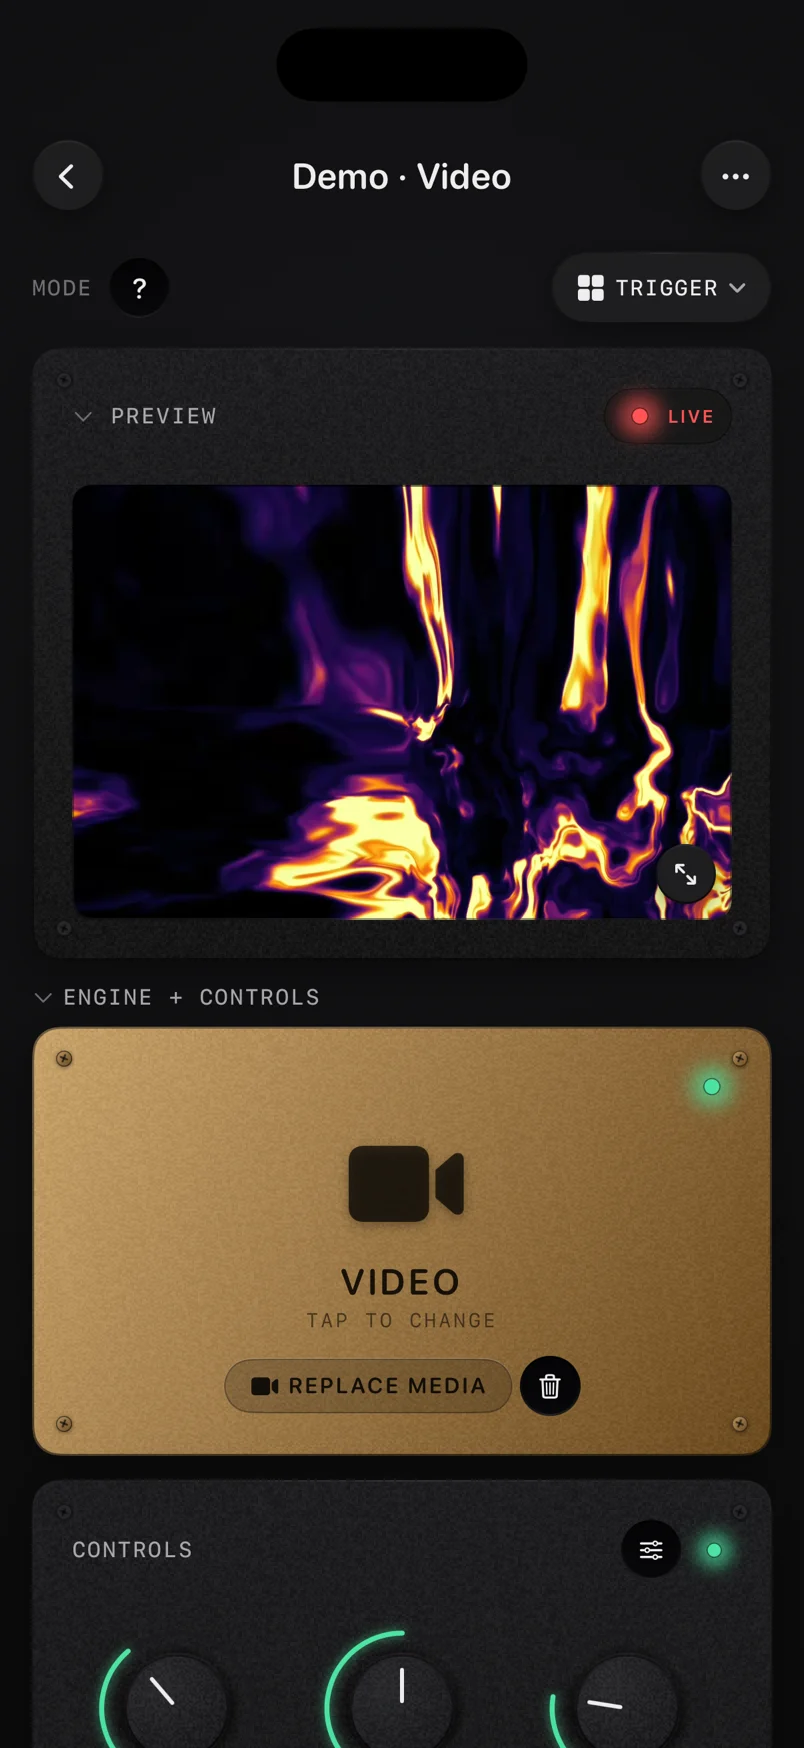
It runs on iPhone, iPad and Mac. It is free to download, and ImmerGround Pro is $6.99 a week or $39.99 a year. Two honest limits. Recording happens in real time, so a four-minute song takes four minutes to play through once before Render HD runs on its own. And the app's renders are horizontal 16:9, so for a vertical Short or Reel, the browser visualizer's 9:16 take is the quicker route.
Six mistakes that make a visualizer video look cheap
- A picture that never rests. If everything moves all the time, nothing lands on the beat. Narrow the ranges until the frame is almost still between hits.
- Every effect at once. Glitch, kaleidoscope, strobe, colour shift and blur together look like a demo reel of the software, not your song. Three rows is the right number.
- The first second wasted. On a phone, the first second decides whether anyone stays. Start one bar before the hook, not at the intro.
- The wrong shape. A horizontal video in a vertical feed arrives letterboxed and small. Make one take per shape instead of cropping later.
- Strobing too hard. Fast full-frame flashing is uncomfortable for many viewers and a real risk for some. Keep flashes short, a few per second at most.
- Somebody else's song. A visualizer over a track you do not own is still that track. On YouTube, a match with a rights holder's music gets a Content ID claim, and the owner's settings decide whether your video is blocked, earns money for them, or is only tracked. Use your own music, or music you have the rights to.
Where to get it
- Free live audio visualizer. Your song, your clip or photo, the app's effects, and a video out: 16:9, 9:16 or 1:1, up to 60 seconds with a small immer ground mark, nothing uploaded. Free, in your browser.
- BPM finder. The tempo and the key of your song from the file, to plan cuts and start takes on the bar. Free, in your browser.
- Free VJ loops. 4K and 1080p loops at 120 BPM, CC0, no email, for when you have no footage of your own.
- ImmerGround. The whole song, re-rendered at any size, with MIDI control and motion tracking, on iPhone, iPad and Mac. Free to download; ImmerGround Pro is $6.99 a week or $39.99 a year.
What to do next
- Pick the section of your song that carries the hook, and export the master as a file.
- Choose one picture with contrast, shot or cropped for the shape you will post.
- Open the visualizer, load both, and build the three mappings: bass to zoom, beat to a flash, high to RGB split.
- Record one take per platform you plan to post on, starting one bar before the hook.
- Post, then watch the first three seconds of the analytics. If people leave early, move the start closer to the drop and record again.
- For the full-length version, move to the app and record the whole song once. If you want to know how the same mapping idea works live, our guide to audio-reactive visuals without TouchDesigner goes deeper.