A night vision effect is easy to get wrong: tint a clip green and it looks like a colour grade, not like footage through a tube. The look people recognise comes from how real night vision works, and once you know the five traits that make it read as night vision, you can get it free on an iPhone, in a browser or in a desktop editor. This guide covers how real night vision produces its picture, the five traits to copy, why iPhone Night mode and thermal cameras are something else, the free ways to get the effect with their catches, how to build it by hand, and how to shoot footage that makes the effect convincing.
Real night vision is amplified light on a green screen
Classic night vision goggles do not film anything. Inside is an image intensifier tube, and the manufacturers describe it in three steps. Light enters and lands on a photocathode, which turns each photon into electrons. A microchannel plate right behind it multiplies those electrons; Exosens, the company formerly known as Photonis, calls it an electron avalanche. The electrons then hit a phosphor screen, which glows, and you look at that glowing screen through an eyepiece.
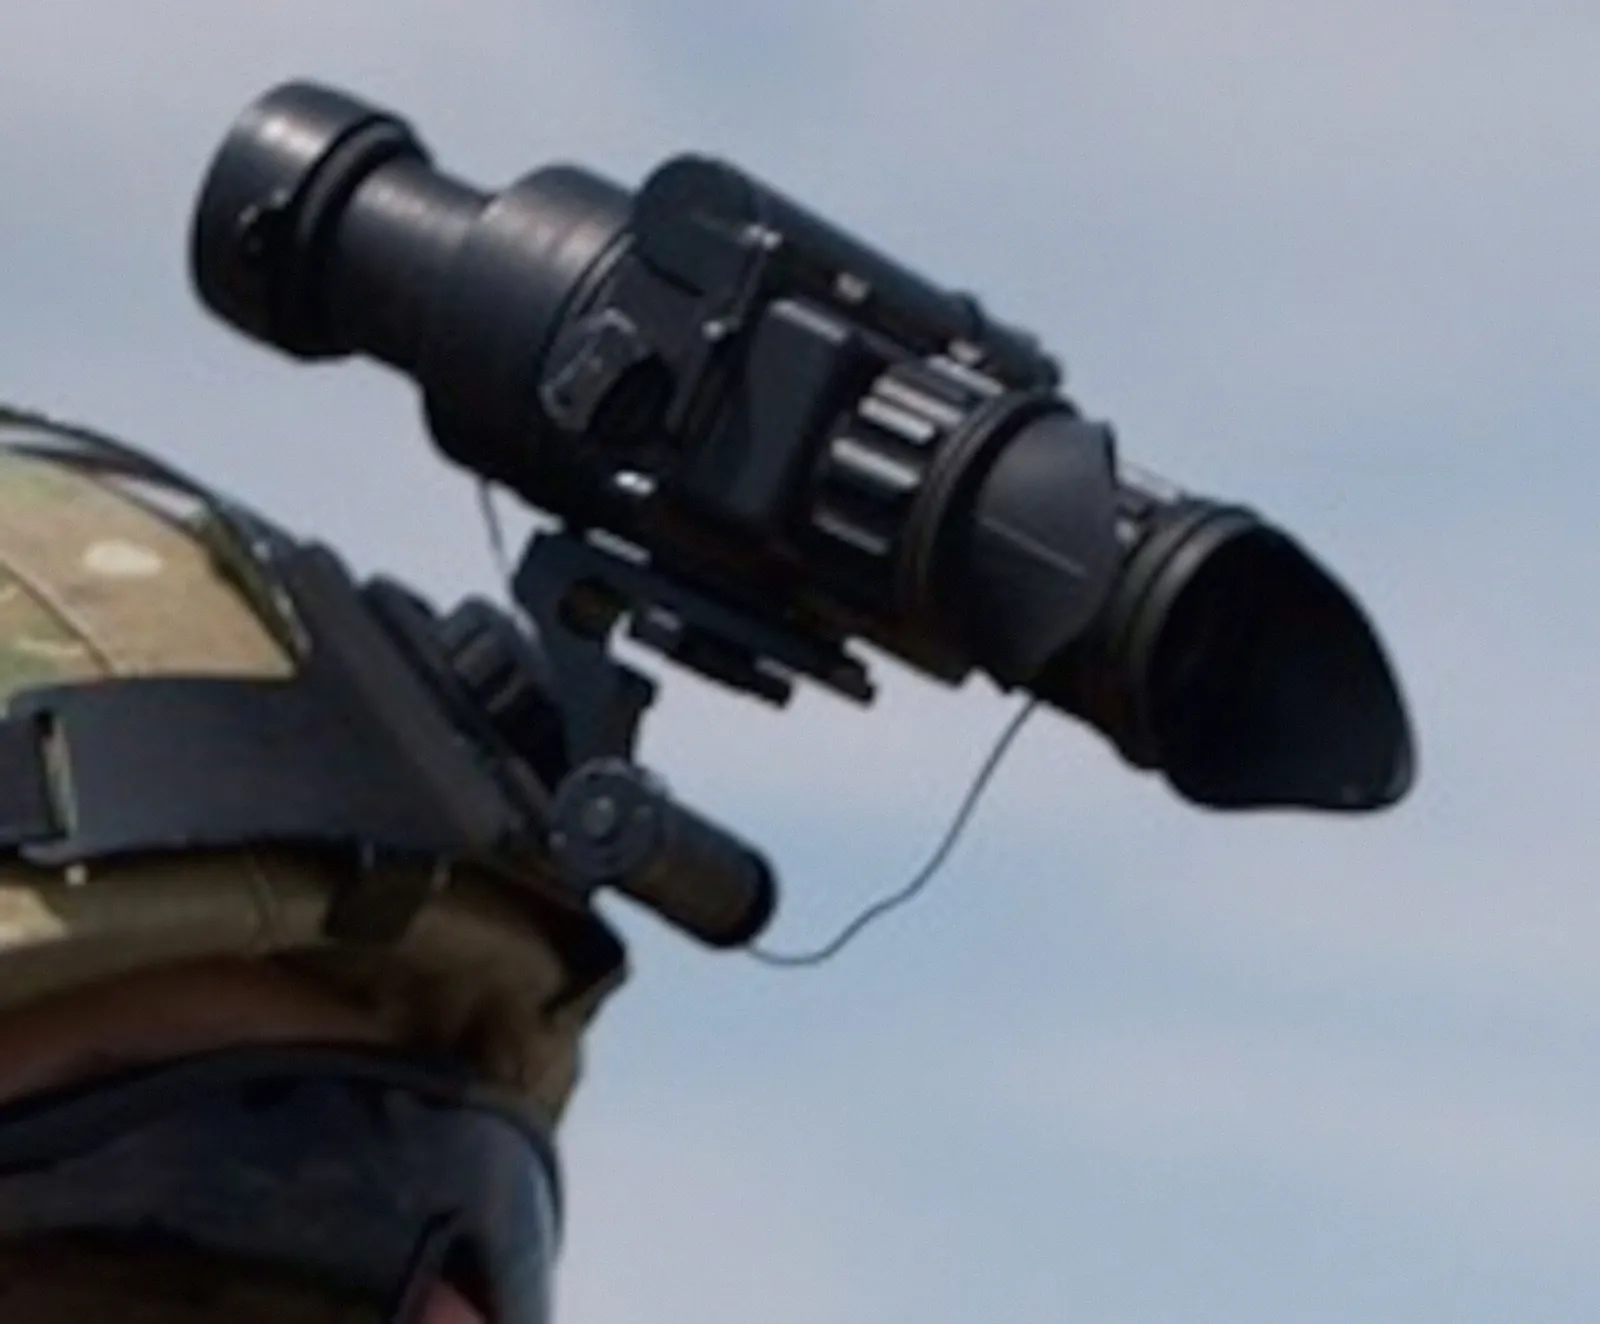
The colour comes from the phosphor. Exosens names the green one P43 and the white one P45, says there is no lab performance difference between them and that soldier trials found none in the field either, so the choice is mostly about which one tires the eyes least. L3Harris, another tube maker, says white phosphor gives a more natural view with better contrast. Green is the classic look, and the reason usually given is the eye: human daylight vision is most sensitive to light around green-yellow, and makers say green is easy on the eyes over long use.
There is also digital night vision, which works differently. SiOnyx and Pulsar, who make it, describe a camera sensor with large pixels that gather more light, often paired with an infrared illuminator, shown on a small screen. For an effect, what matters is that the green-tube look is the one audiences recognise from films, games and news footage.
Five traits make footage read as night vision
Look closely at real footage through a tube and five things stand out. Copy all five and the effect reads as night vision; copy only the colour and it reads as a green filter.
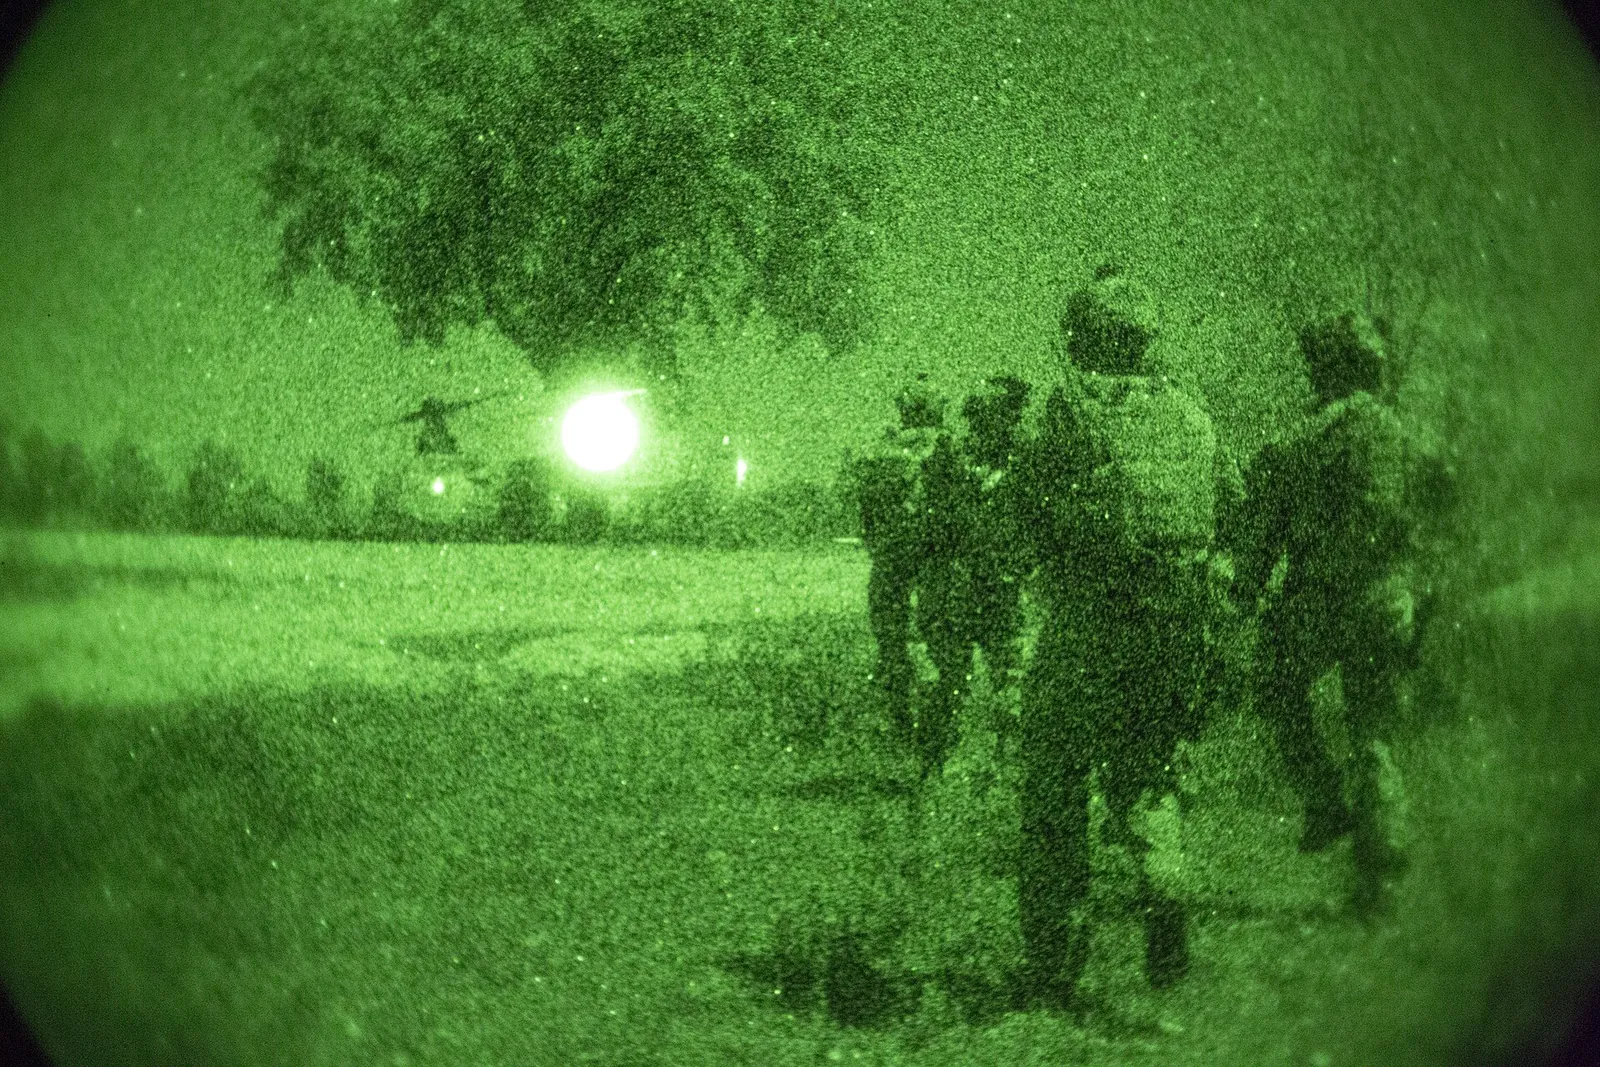
- Brightness mapped to one colour. The picture is monochrome: dark areas near black, bright areas bright green. It is not a green tint over colour; the colour is gone and only brightness remains.
- Grain that moves. ATN's manual for the PVS-14 monocular calls it scintillation, a faint, random sparkle across the image, stronger in low light, and notes it is also called video noise. It moves every frame, which is why a still grain texture looks fake.
- Halos around bright lights. L3Harris describes halo as a diffuse glow around bright lights, caused by electrons scattering inside the tube. Headlights, lamps and muzzle flashes bloom far wider than in normal video.
- A round edge. The image through a tube is a circle; ATN's manual says the viewed image should be a full circle, with a 40 degree field of view on the PVS-14. Footage filmed through the eyepiece shows a round picture fading to black at the edges.
- A faint honeycomb near bright lights. ATN lists a fixed-pattern noise that looks like a faint hexagonal pattern, most often at high light levels. It is subtle, and adding a trace of it is the detail that makes experts nod.
Most free effects do the first trait, some add the second, and very few do the last three. That is the gap the by-hand section below fills.
A quick test for any effect you try: pause on a frame with a lamp or a screen in it and look at three places. Is there any colour left in the shadows? Does the light bloom into a soft halo? Do the corners fall away to black? Three yeses and the frame reads as a tube; three noes and it reads as a filter.
Night mode, thermal and night vision are three different things
Search results mix these up, and the confusion leads people to the wrong tool.
- iPhone Night mode is a photo mode. Apple's support page describes it as a way to capture photos when the camera detects a low-light environment, on iPhone 11 and later, taking a longer shot of up to several seconds. It keeps natural colour and it is not green. On current iPhones the only video use Apple lists is Night mode Time-lapse, filmed on a tripod.
- Thermal imaging shows heat, not light. Teledyne FLIR puts it plainly: its cameras make pictures from heat, not visible light, and everything gives off some heat, even ice. Thermal footage shows up in grey or in false-colour palettes such as white hot, black hot or red hot, not in the green of a tube.
- Night vision amplifies light that is already there. FLIR notes that goggles need some visible light, and cannot see well if there is not enough of it; that is why some add an infrared illuminator.
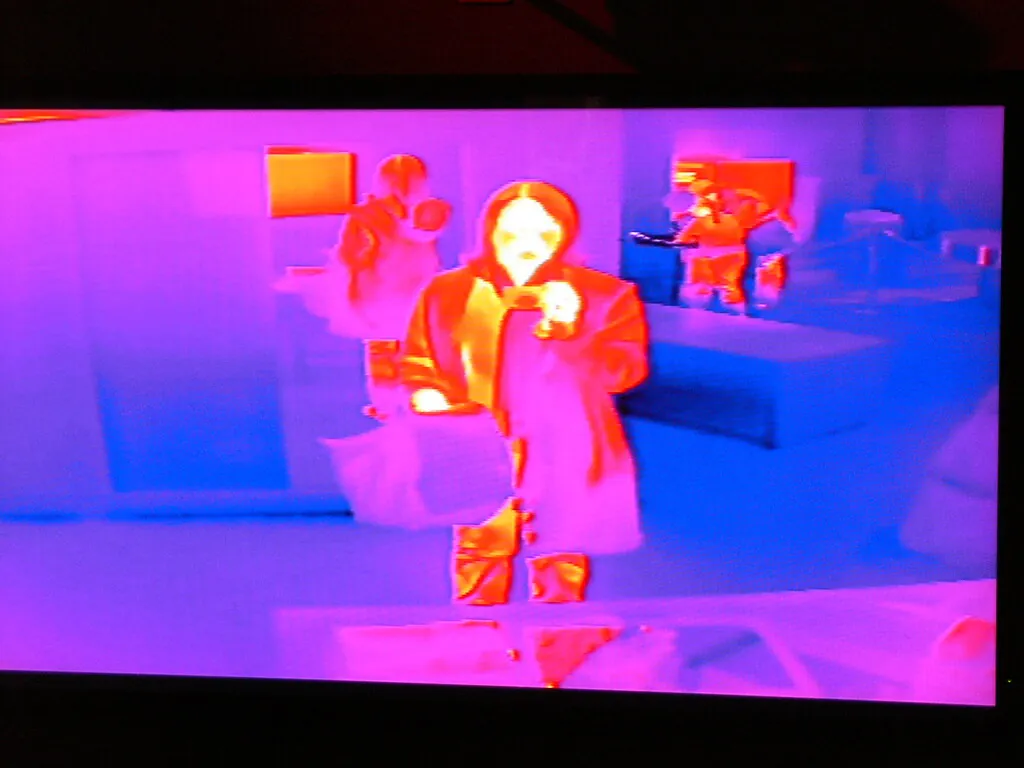
For an effect, this means two separate looks. Night vision is green brightness with grain, halos and a round edge. Thermal is a false-colour ramp where bright means hot, and our guide to the thermal camera effect covers that look on its own. Some apps and sites label an amber look as thermal; real thermal cameras do not work that way, and neither look is what iPhone Night mode does.
Get the look free in your browser, moving with the music
The quickest free route is our own live audio visualizer, and it does something the other free tools do not: the effect moves with music. It runs entirely in your browser, and nothing you load is uploaded.
- Pick the picture. Load your own clip or photo, or turn on the camera to see yourself in night vision.
- Pick the Night vision preset. It sets the look to full and adds three mappings: a stutter on every beat, a glitch that rises with the highs, and a small zoom on the bass.
- Pick the sound. A song file gives the cleanest result; the microphone works with music playing in the room; the built-in demo beat needs no music of your own.
- Record. Choose 16:9, 9:16 or 1:1 and record up to 60 seconds, up to 1080p, with a small immer ground mark in the corner.
Three changes to the preset are worth trying once it plays:
- Night vision only on the drop. Take the look off full and use the Night Vision Sting trigger on the drop, so the picture flashes into night vision at the loudest moment and returns to colour after it.
- Less glitch, more zoom. For a calmer track, lower the glitch range and let the bass push a slow zoom: it reads like a sight searching the dark.
- Pixelate on the highs. A little pixelation on the hi-hats gives a cheap digital camera feel, closer to digital night vision than to a tube.
An honest note on what it does and does not do. The look itself is a soft green ramp: it drops the colour and maps brightness to green, which is trait one done properly. It does not add moving grain, halos or a round edge on its own, so for a music video or a short that is often enough, and for a film shot that must pass as real goggle footage it is the first step, not the last.
On iPhone: an app that follows the music, the free editors, and the novelty apps
On the phone, the options split into three kinds, and they suit different jobs:
| Option | What you get | Free, and the catch |
|---|---|---|
| ImmerGround | Night vision among its thermal looks, on your own clip or photo, moved by the music and a MIDI controller | Free to download; ImmerGround Pro is $6.99 a week or $39.99 a year; the re-render is 16:9 |
| CapCut | Free night vision templates made by users, in the phone app, desktop and web editor | Watermark-free if you avoid Pro items and delete the logo clip at the end; templates may carry a watermark |
| VEED | A Night Vision filter among its filters, in the browser, no account needed | Free exports carry a watermark and stop at 720p |
| Night vision camera apps | Live green camera effects, some also for saved videos | Free with in-app purchases; watermark rules not stated on the listings |
| iMovie and Photos | Filters and adjustments, but no night vision filter | Free; you can only approximate the colour |
ImmerGround
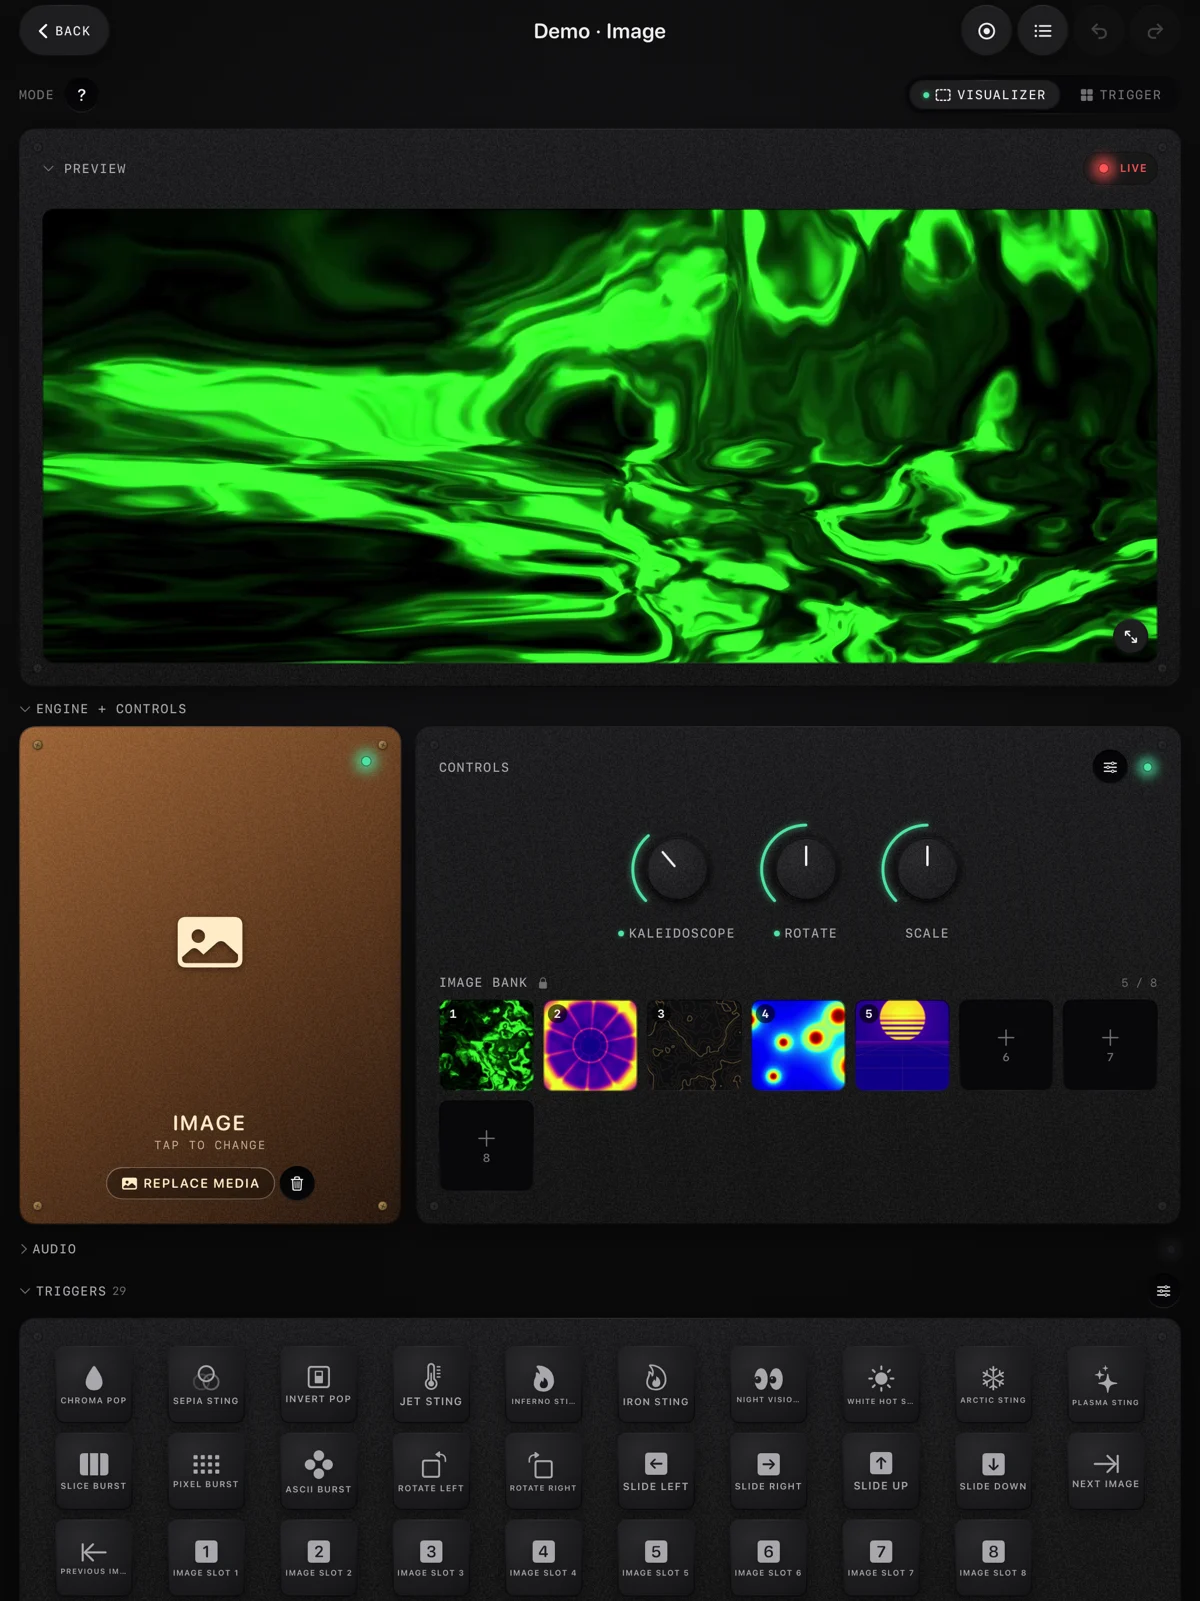
ImmerGround, which we make, has night vision in its set of looks alongside inferno, iron, jet, white hot, arctic and plasma. You load a clip into the video engine or a photo into the image engine, and map the look and other effects to the music and to your MIDI controller, so the picture can snap into night vision on a pad hit, or pulse with the kick. Every session saves a real-time recording, and Render HD re-renders it at up to 4K, always in 16:9. It is built for music visuals: it will not add a round goggle mask or a honeycomb, and it is not a camera app.
CapCut and VEED
CapCut's site has a night vision page that leads to free templates from its community rather than a built-in effect called night vision. Exports can be free of a watermark if you avoid anything marked Pro and delete the short logo clip CapCut sometimes adds at the end, and its help centre says 4K at 60 fps export is a Pro feature on desktop. VEED lists Night Vision among the filters on its filter page and says every effect is free to use; the catch is in its help centre, where free exports carry a VEED watermark and are limited to 720p.
The novelty camera apps
Search the App Store for night vision and you will find apps such as Night Vision: Camera Effect, Thermal & Night Vision Camera, and Night Vision - Camera & Video, all free to download with in-app purchases from about $1 to $120. The first one's listing carries an honest disclaimer: its night vision, infrared and thermal features are visual effects only. That is true of all of them. No app can make an iPhone see in the dark the way a tube does; they apply a filter to what the camera already sees.
Build it by hand in a free editor
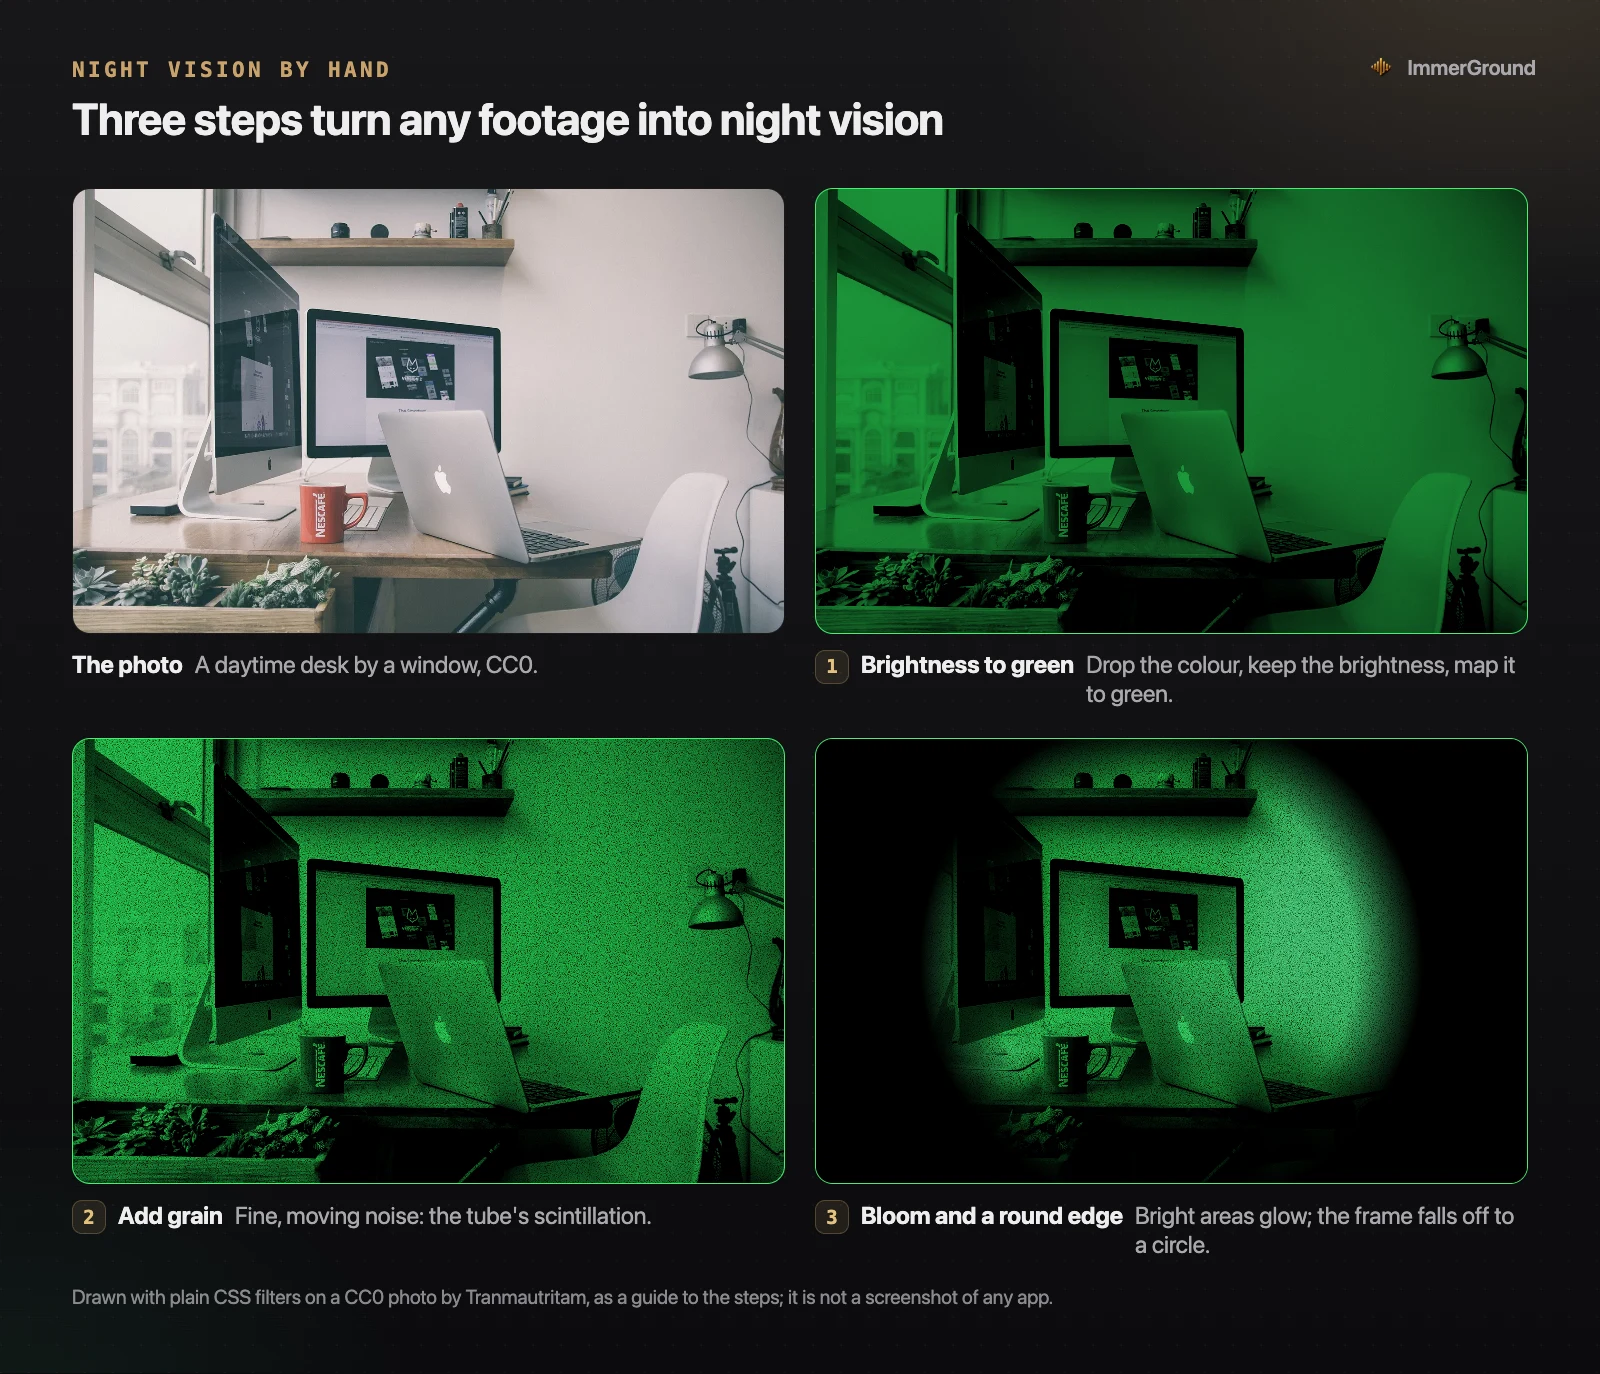
For full control, build the look yourself. The free version of DaVinci Resolve is the strongest free editor for it: Blackmagic says it edits and finishes up to Ultra HD at 60 fps, with colour wheels, curves and Power Windows, the shapes you draw to limit an adjustment to part of the frame. Resolve 21 needs macOS 15 on an Apple Silicon Mac, or Windows 10 with 16 GB of memory; there is also a free iPad version, with the Studio upgrade at $94.99 on the US App Store. The recipe works in any editor with the same tools:
- Drop the colour. Set saturation to zero, then use curves to crush the shadows and lift the mids. Real tube footage has deep blacks and a bright, narrow range of greens.
- Map to green. Push the gain or highlights towards green and pull red and blue down, until white becomes bright green and grey becomes mid green. Keep a trace of blue in the highlights if you want the newer white-phosphor feel instead.
- Add moving grain. Use a grain or noise effect that changes every frame, stronger in the dark areas. Blackmagic lists film grain among Resolve's tools; some grain effects, such as the one in Film Look Creator, are Studio features.
- Bloom the lights. A glow effect, limited to the brightest parts of the image, gives the halo around lamps and headlights.
- Cut a circle. A circular Power Window with the outside darkened to black, softened at the edge, gives the tube's round view. For a monocular look, keep it smaller than the frame.
- Optional: honeycomb. A faint hexagon texture over the brightest areas, at a few percent, is the finishing detail.
Starting values
| Step | Start here | Then adjust by eye |
|---|---|---|
| Saturation | 0 | Keep it at 0; any colour left shows through the green |
| Contrast | Blacks down hard, mids up a little | Stop before faces lose detail |
| Green | Highlights strongly green, red and blue low | Add a touch of blue for a white-phosphor feel |
| Grain | Fine, animated, more in the shadows | Raise it for darker scenes, as real tubes do |
| Glow | Only the brightest few percent of the image | Lamps should bloom; walls should not |
| Circle | A soft edge, slightly smaller than the frame height | Smaller and harder for a monocular look |
The same steps work in a compositing app or a VJ tool with the right effects. In ImmerGround or the free visualizer, the look covers steps one and two, and you can add glitch, pixelate or stutter on top, but not steps three to six.
Make it convincing: shoot for the effect, not against it
The effect is only as good as the footage under it. A few habits make a large difference:
- Shoot dark, with a few lights in frame. Night vision footage is a dark scene with small bright sources: a lamp, a phone screen, headlights. Those sources are what bloom into halos. A daylight scene with a blue sky never passes, because the sky turns into a flat bright wall.
- Underexpose rather than brighten. Real tubes hold deep blacks. Lifting the shadows in post makes noise without making it look like a tube.
- Keep the camera handheld and close. Goggle footage is filmed from a head or through an eyepiece. A slow, slightly shaky move sells it better than a tripod shot.
- Use a narrow framing. A 40 degree view is narrower than a phone's main camera, so a longer lens or a crop reads closer to the real thing.
- Keep people's faces lit from the front. Faces read in night vision when there is some light on them; a face in total darkness becomes a noisy blur.
Where the look earns its place: a horror short or a game trailer shot on a phone, a music video's darkest verse, a live set where one drop turns the screen green, or a surveillance-themed scene in a film project. Where it does not: long stretches, because the eye tires of a single colour faster than of a full-colour picture.
For music content, the look works best as a moment rather than a whole video: a chorus, a drop, or a stutter on each beat. The same idea runs through our guide to visualizer videos, and a clean night vision loop is part of our free thermal loop pack.
Where "just add a green filter" goes wrong
The advice you will find most often is to lower the saturation and add a green tint. It gets you a green video. It does not get you night vision, for three reasons. A tint keeps the original colours faintly under the green, while tube footage has none. A still frame of grain, or none at all, reads as a filter because real scintillation moves. And without halos and a round edge, the eye reads a graded clip, not a view through a device.
The opposite mistake is overdoing it: heavy scan lines, a timestamp and a fisheye all at once. Scan lines and timestamps belong to security camera footage, which is a different look again. Pick one reference, real goggle footage, and copy it trait by trait.
And the limit of this guide: none of these tools, ours included, can reveal detail that was not recorded. If a scene is black in the original clip, the effect will turn it into green noise, not a hidden view.
Where to get it
- Free live audio visualizer. In your browser: the Night vision preset on your clip, photo or camera, moving with a song or the room, recorded up to 60 seconds in 16:9, 9:16 or 1:1 with a small immer ground mark. Nothing is uploaded.
- Free thermal VJ loops. Night vision, inferno, iron, jet, white hot, arctic and plasma loops in 4K and 1080p, CC0, no email.
- ImmerGround. iPhone, iPad and Mac: night vision and the other thermal looks on your own footage, moved by music and MIDI. Free to download; ImmerGround Pro is $6.99 a week or $39.99 a year.
- Free editors: DaVinci Resolve for the full recipe, CapCut for templates on the phone, and VEED in the browser.
What to do next
- Look at real footage first and find the five traits in it: green brightness, moving grain, halos, the round edge, and the faint honeycomb near lights.
- Shoot a test clip in a dark room with one lamp and a phone screen in frame, slightly underexposed and handheld.
- Try the free visualizer's Night vision preset on that clip with a song, and record a 9:16 take for a short.
- If it must pass as real goggle footage, take the clip through the by-hand recipe in DaVinci Resolve: grain, glow and the round window.
- For music visuals, read our guide to audio-reactive visuals and map the look to the drop instead of leaving it on all the time.
.jpg)
