Connecting a physical MIDI controller to ImmerGround provides tactile control over visual performances, replacing screen taps with direct, physical hardware interaction. By mapping knobs, faders, and pads to render parameters, you trigger clips, route signal effects, and swap blending modes without looking at the device display. This setup allows performers to maintain visual focus on the audience while executing complex visual commands.
Class-Compliant MIDI Protocol in ImmerGround
ImmerGround relies entirely on the class-compliant MIDI protocol provided by the CoreMIDI framework on Apple operating systems. This integration guarantees that any MIDI controller functioning without proprietary driver installations maps directly into the rendering engine.
When you connect a hardware unit, the operating system registers the device endpoints, exposes them to the CoreMIDI server, and ImmerGround reads the incoming signal bus automatically. The standard hardware connection path utilizes USB-C.
25 kbaud 5-pin DIN MIDI protocol. A direct USB-C connection guarantees the lowest possible signal latency for Note On, Note Off, and Continuous Controller (CC) data.
The operating system polls the USB bus at high frequencies, capturing hardware state changes in milliseconds and passing them to the visual engine. This low-latency pipeline is critical for rhythm-based visual triggers, where a visual clip must fire exactly when the audio beat hits.
The USB-C bus also provides substantial power delivery, eliminating the need for bulky external power supplies for most mid-sized MIDI controllers. For performers moving around a stage or minimizing cable clutter, Bluetooth LE (Low Energy) MIDI offers an alternative connection method.
CoreMIDI handles the Bluetooth pairing process at the system level. Once you establish the pairing, ImmerGround sees the wireless controller exactly like a wired USB device.
4 GHz spectrum. High-density environments like clubs or arenas often saturate this frequency band, leading to packet loss or jitter.
Therefore, you must evaluate the risk before relying on wireless MIDI for critical triggers. While Bluetooth MIDI functions well for slow parameter sweeps, sharp rhythmic hits demand the reliability of a wired connection.
MIDI data consists of short binary messages. A Note On message contains a channel number (1 to 16), a note value (0 to 127), and a velocity value (0 to 127).
ImmerGround uses these Note On messages to fire video clips, trigger scene snapshots, or swap camera rendering modes. When you map a physical pad to a clip slot, the engine listens for a specific note on a specific channel.
Striking the pad sends the Note On message, firing the clip instantly. Releasing the pad sends a Note Off message, which you can route to a stop command, a blackout trigger, or a fade-out envelope.
The velocity data determines the initial intensity of the triggered effect, providing an extra layer of dynamic control. Continuous Controller (CC) messages handle knobs, sliders, and faders.
A CC message sends a value from 0 to 127 based on the physical position of the hardware control. ImmerGround binds these CC streams to continuous visual parameters like scale, rotation, opacity, blur radius, or color hue.
As you turn a knob, the hardware sends a continuous stream of CC values, and the render engine updates the visual state at 60 frames per second. Understanding the distinction between these message types is crucial for stage planning.
You assign pads to discrete actions and faders to continuous parameters. ImmerGround parses these incoming byte streams via CoreMIDI, translating 7-bit MIDI resolution into the floating-point values required by the graphics rendering pipeline.
SysEx (System Exclusive) messages form another layer of the MIDI specification, though they operate differently than standard Note or CC data. SysEx messages transmit device-specific data, such as firmware updates, custom LED color maps, or complete controller configuration backups.
While ImmerGround focuses primarily on Note and CC data for real-time visual control, understanding SysEx is vital when configuring advanced controllers like the Novation Launchpad series. These controllers often require SysEx commands to switch from standard DAW mode into a raw generic MIDI mode.
By sending specific hex string commands via a utility application before launching ImmerGround, you force the controller to output raw Note and CC data, ensuring full compatibility with the visual engine. This preparation step guarantees the hardware functions predictably under live pressure.
MIDI Controller Hardware Compatibility
Hardware choice dictates how you interact with visual sets. Different controllers offer varying densities of pads, knobs, and faders.
The physical layout influences your muscle memory during a performance. Grids of pads excel at clip launching, while banks of faders excel at opacity mixing and color grading.
Choosing the right form factor reduces cognitive load during a live show. The Novation Launchpad Mini MK3 and Launchpad X provide large 8x8 grids of RGB pads.
These controllers send Note On messages for each of the 64 pads, making them ideal for firing large arrays of video clips or triggering complex scene snapshots. The Launchpad series requires USB bus power.
The Launchpad X includes velocity-sensitive pads, which you can map to dynamic parameters like stroke thickness, point element burst density, or audio-reactive thresholds. Hitting a pad harder increases the visual intensity instantly, providing a deeply expressive performance layer.
For parameter manipulation, controllers like the Korg nanoKONTROL2, Akai MIDImix, or Novation Launch Control XL offer rows of faders and knobs. Faders provide absolute visual feedback of a parameter's current state.
If a fader sits at the bottom of its travel, you know the opacity is at zero. If it sits at the top, opacity is at maximum.
Knobs work well for dialing in rotation speeds, color shifts, or distortion amounts. The nanoKONTROL2 is highly compact, fitting in a backpack alongside an iPad, while the MIDImix and Launch Control XL offer more robust fader travel for precise, slow transitions.
The physical length of a fader, often 45mm to 60mm, dictates the precision of the fade. Hybrid controllers, such as the Akai LPD8, Akai MPK Mini IV, or the Arturia BeatStep, combine pads and knobs in a single physical footprint.
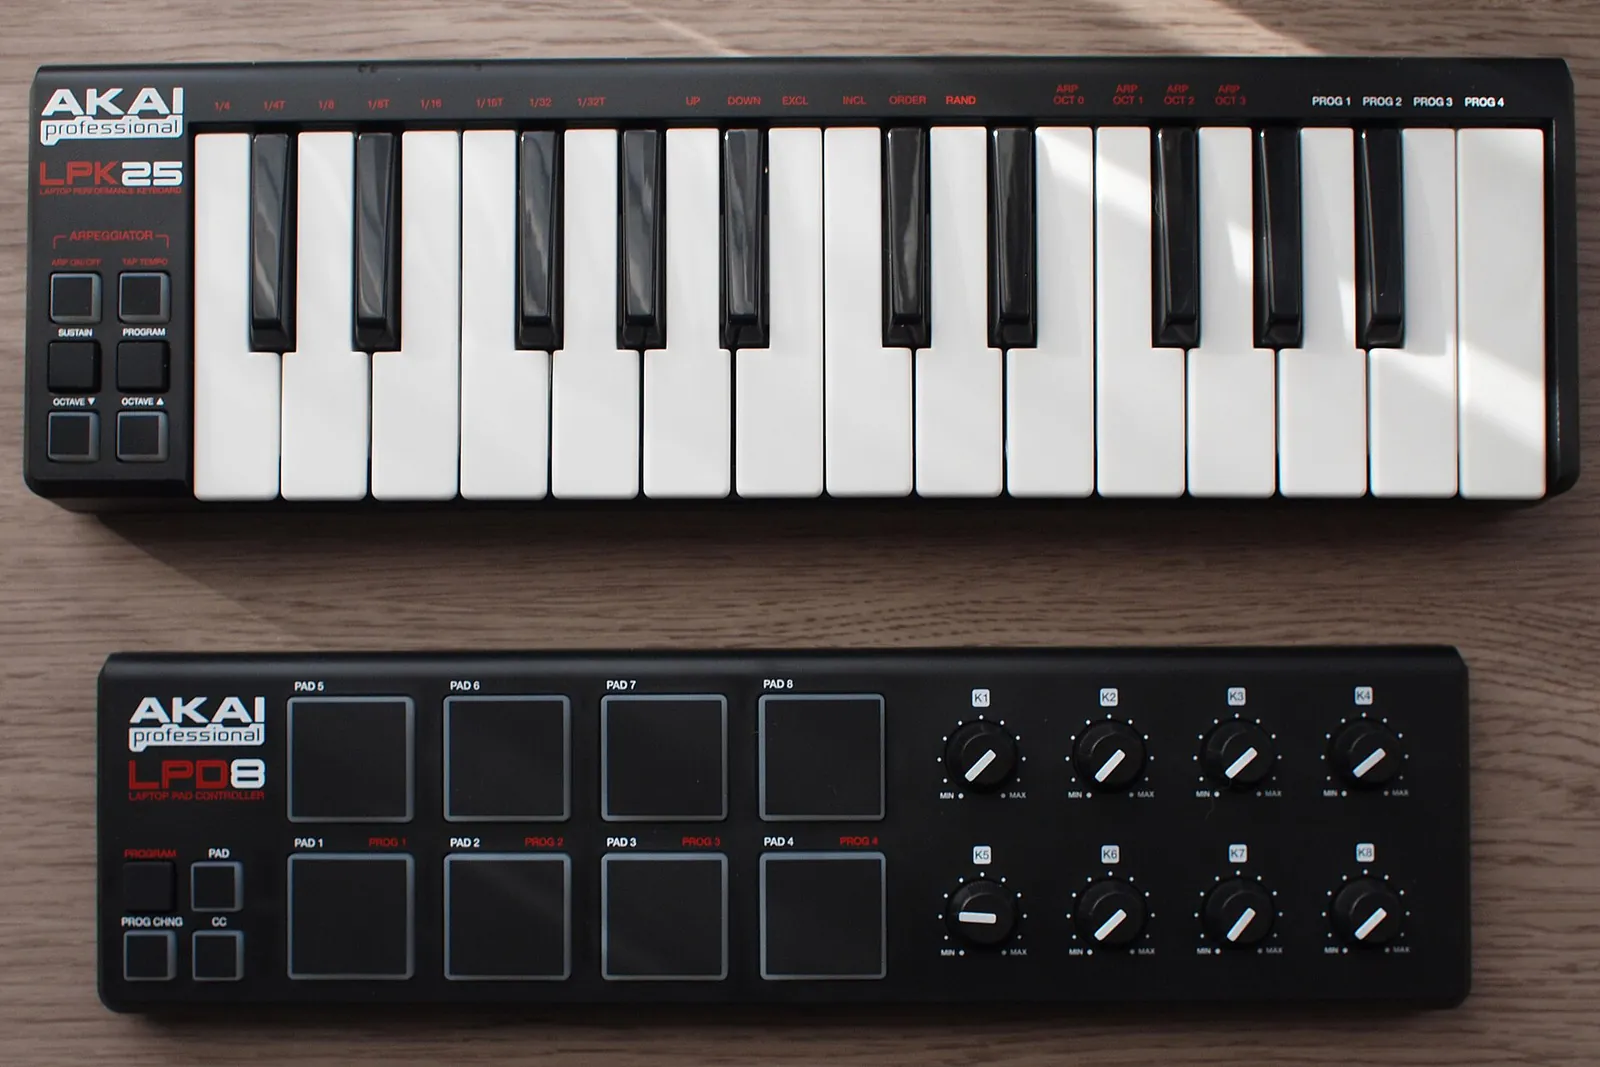
The LPD8 MK2 features 8 pads and 8 knobs, providing enough control for a minimal visual set without requiring significant desk space. The BeatStep includes 16 pads and 16 endless rotary encoders.
Endless encoders send relative MIDI data, incrementing or decrementing values, rather than absolute positions. ImmerGround supports both absolute and relative CC mapping, allowing you to use endless encoders to nudge values up or down continuously without worrying about parameter jumps.
This prevents visual tearing when switching between complex scene presets. To evaluate the best hardware for your specific performance setup, reference the comparison table below.
Note the connection types and physical control counts to match your routing requirements.
| Controller | Pads | Knobs | Faders | Connection | Est. Price (US) |
|---|---|---|---|---|---|
| Novation Launchpad Mini MK3 | 64 | 0 | 0 | USB-C | $109 |
| Novation Launchpad X | 64 (Velocity) | 0 | 0 | USB-C | $199 |
| Akai APC Mini MK2 | 64 | 0 | 9 | USB-B | $99 |
| Novation Launch Control XL | 0 | 24 | 8 | USB-B | $159 |
| Akai MIDImix | 0 | 24 | 9 | USB-B | $119 |
| Korg nanoKONTROL2 | 0 | 8 | 8 | Mini-USB | $75 |
| Korg nanoKONTROL Studio | 0 | 8 | 8 | USB/Bluetooth | $160 |
| Behringer X-Touch Mini | 0 | 8 (Encoders) | 1 | Mini-USB | $79 |
| Akai LPD8 MK2 | 8 | 8 | 0 | USB-B | $59 |
| Arturia BeatStep | 16 | 16 (Encoders) | 0 | Mini-USB | $129 |
| Arturia MiniLab 3 | 8 | 8 | 4 | USB-C | $109 |
| Akai MPK Mini IV | 8 | 8 | 0 | USB-B | $119 |
When selecting a controller, consider the tactile response. The resistance of a fader determines how smoothly you can execute a long, ten-second crossfade between two video layers.
High-resistance faders, like those on the Launch Control XL, provide the friction necessary for slow, deliberate movements. Low-resistance faders, common on cheaper units, tend to slide too quickly, resulting in jerky visual transitions.
Pad stiffness also varies significantly between manufacturers. Akai MPC-style pads require a firm, deliberate strike, making them excellent for aggressive drum-style triggering.
Novation Launchpad pads require a lighter touch, favoring rapid sliding gestures across the grid. The velocity sensitivity curves can often be modified within the hardware's companion software to suit your specific playing style.

Using MIDI Learn for Instant Control Binding
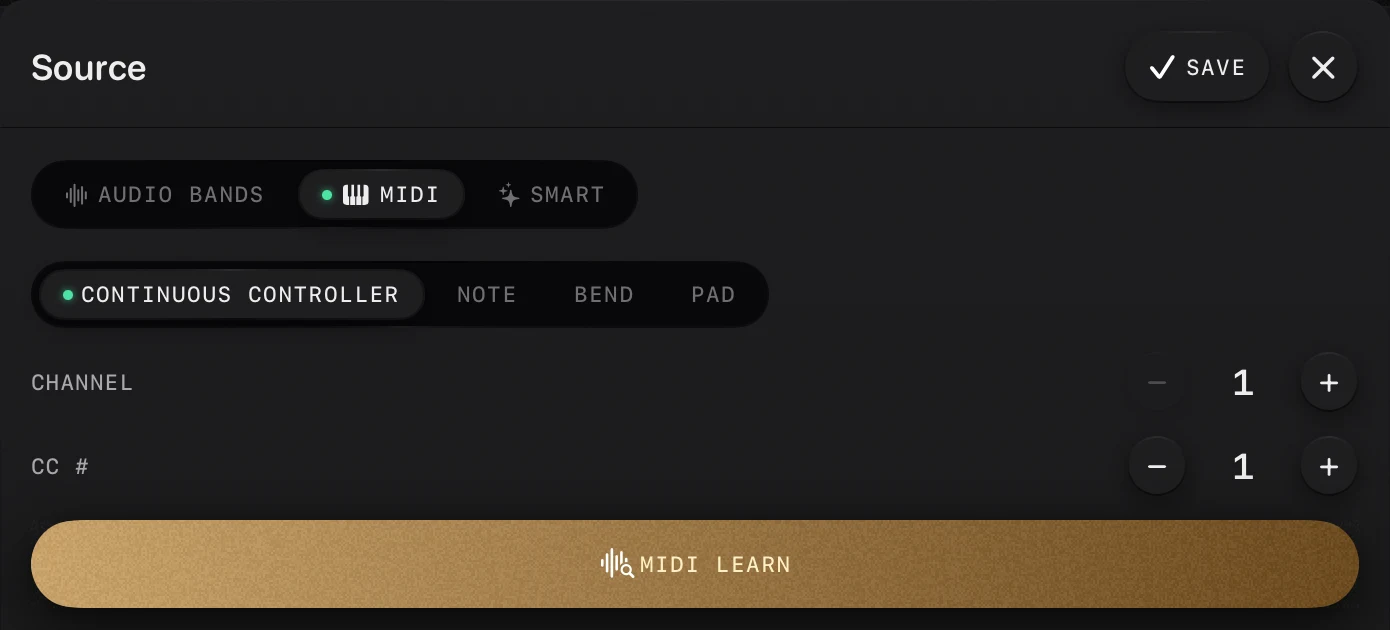
Mapping hardware manually requires memorizing specific CC numbers, note values, and channel assignments. ImmerGround bypasses this tedious process via the MIDI Learn system.
When you activate MIDI Learn, the engine opens an 80 ms capture window. The first valid MIDI message received within this window binds the active visual parameter directly to the physical hardware control.
This rapid workflow enables complex mappings in minutes rather than hours. To map a physical knob to the opacity of a video layer, you tap the layer's opacity control on the screen, tap the gold MIDI Learn button, and twist the physical knob.
ImmerGround registers the incoming channel and CC number, stores the binding configuration in your session file, and closes the capture window instantly. The 80 ms debouncing logic prevents false triggers from adjacent hardware controls that might send jittery data if bumped accidentally.
This window is long enough to capture a deliberate movement but short enough to ignore transient electrical noise. The system differentiates between message types automatically during the learn phase.
If you strike a pad, ImmerGround logs a Note On event. If you move a fader, it logs a CC event.
Pitch bend wheels transmit on a separate protocol utilizing a 14-bit resolution instead of the standard 7-bit. When the MIDI Learn engine detects pitch bend data, it binds the parameter with a much higher precision curve, interpolating the 16,384 possible steps into smooth visual shifts.
You map pitch bend to parameters requiring minute adjustments, such as precise camera pan, fine color grading thresholds, or slow rotational alignments. You map multiple parameters to a single hardware control to create complex visual macros.
Twisting one knob can simultaneously increase saturation, decrease blur, scale an image, and shift a hue value. Each bound parameter retains its own minimum and maximum range settings.
If you map a fader to layer opacity (0 to 100 percent) and layer rotation (0 to 360 degrees), pushing the fader to the top maximizes both values simultaneously based on their individual mathematical scales. This technique allows a single performer to orchestrate massive visual changes with a single hand movement.
ImmerGround handles relative CC encoding differently than absolute CC encoding. Endless rotary encoders send increment and decrement values (often formatted as two's complement or specific integer offsets like 65 for up, 63 for down).
When the MIDI Learn system detects a rapid sequence of identical values at the extreme ends of the 0-127 scale, it categorizes the control as a relative encoder. It then applies an accumulator logic layer, translating the relative nudges into absolute floating-point adjustments for the rendering pipeline.
This prevents the parameter jumping that occurs when physical fader positions misalign with stored software states. Session templates store all MIDI bindings permanently.
You map your controller once, save the file, and load it at the venue. If you swap controllers, you will need to remap the controls or edit the underlying JSON configuration to match the new hardware's CC assignments.
Backing up these configuration files ensures you can recover a complex show map if an iPad or Mac suffers a hardware failure before a performance. The mappings are stored independently of the media assets, allowing you to reuse a successful control layout with fresh video clips for different tours.
Configuring USB-C Hubs, Power Delivery, and Bluetooth Latency
Connecting multiple MIDI controllers, external hard drives, and external displays to a single iPad or Mac requires a USB-C hub. The hub manages the data routing and power distribution across the entire hardware ecosystem.
Not all hubs handle MIDI data efficiently. Cheap passive hubs often drop packets, introduce jitter into the data stream, or fail entirely under heavy load, causing visual stutters when you drag a fader quickly.
Always select an active USB-C hub featuring Power Delivery (PD) passthrough. The hub must supply sufficient wattage to power the host iPad or Mac, the active display adapter (HDMI or DisplayPort), and all bus-powered MIDI controllers simultaneously.
A controller like the Launchpad X draws significant power to illuminate its 64 RGB LEDs at maximum brightness. If the hub lacks sufficient power headroom, the controller will fail to initialize, or the operating system will terminate the USB connection entirely to protect the logic board.
Use a power adapter rated for at least 60W, preferably 100W, to ensure a stable voltage rail across all physical ports. Connect the high-wattage power adapter to the hub's dedicated PD input port, connect the MIDI controllers to the USB-A or USB-C data ports, and route the final host cable to your device.
This specific topology guarantees that a drop in device battery level does not interrupt the MIDI data flow. It also ensures the host device remains charged during a multi-hour performance, preventing catastrophic shutdowns mid-set.
For stage environments where physical tethering restricts performer movement, Bluetooth LE MIDI provides a wireless alternative. Wireless controllers like the Korg nanoKONTROL Studio pair directly to the iOS or macOS Bluetooth radio, bypassing the USB hub entirely.
While highly convenient, wireless connections introduce inherent latency and risk data packet loss. 4 GHz interference, degrading the Bluetooth signal integrity.
CoreMIDI compensates for dropped packets by buffering the data, which directly increases latency. A wired USB connection operates at a near-instantaneous 1 to 2 milliseconds of latency.
A clean Bluetooth LE connection averages 15 to 20 milliseconds but can easily spike to 50 milliseconds or drop entirely in hostile RF environments. Use wired USB connections for critical, rhythm-synced triggers and reserve Bluetooth for ambient, non-time-critical parameter sweeps or remote technical checks during soundcheck.
When building a hub-based rig, consider the physical polling rate of the USB controller chip inside the hub. 2 solid-state drive on an adjacent port.
Isolating bandwidth-heavy devices (cameras, drives) from interrupt-heavy devices (MIDI controllers, audio interfaces) ensures a smooth 60 frames-per-second render output. Proper hardware selection at the hub level dictates the absolute reliability of the entire visual system.
MIDI Signal Bus and Inter-App MIDI Routing
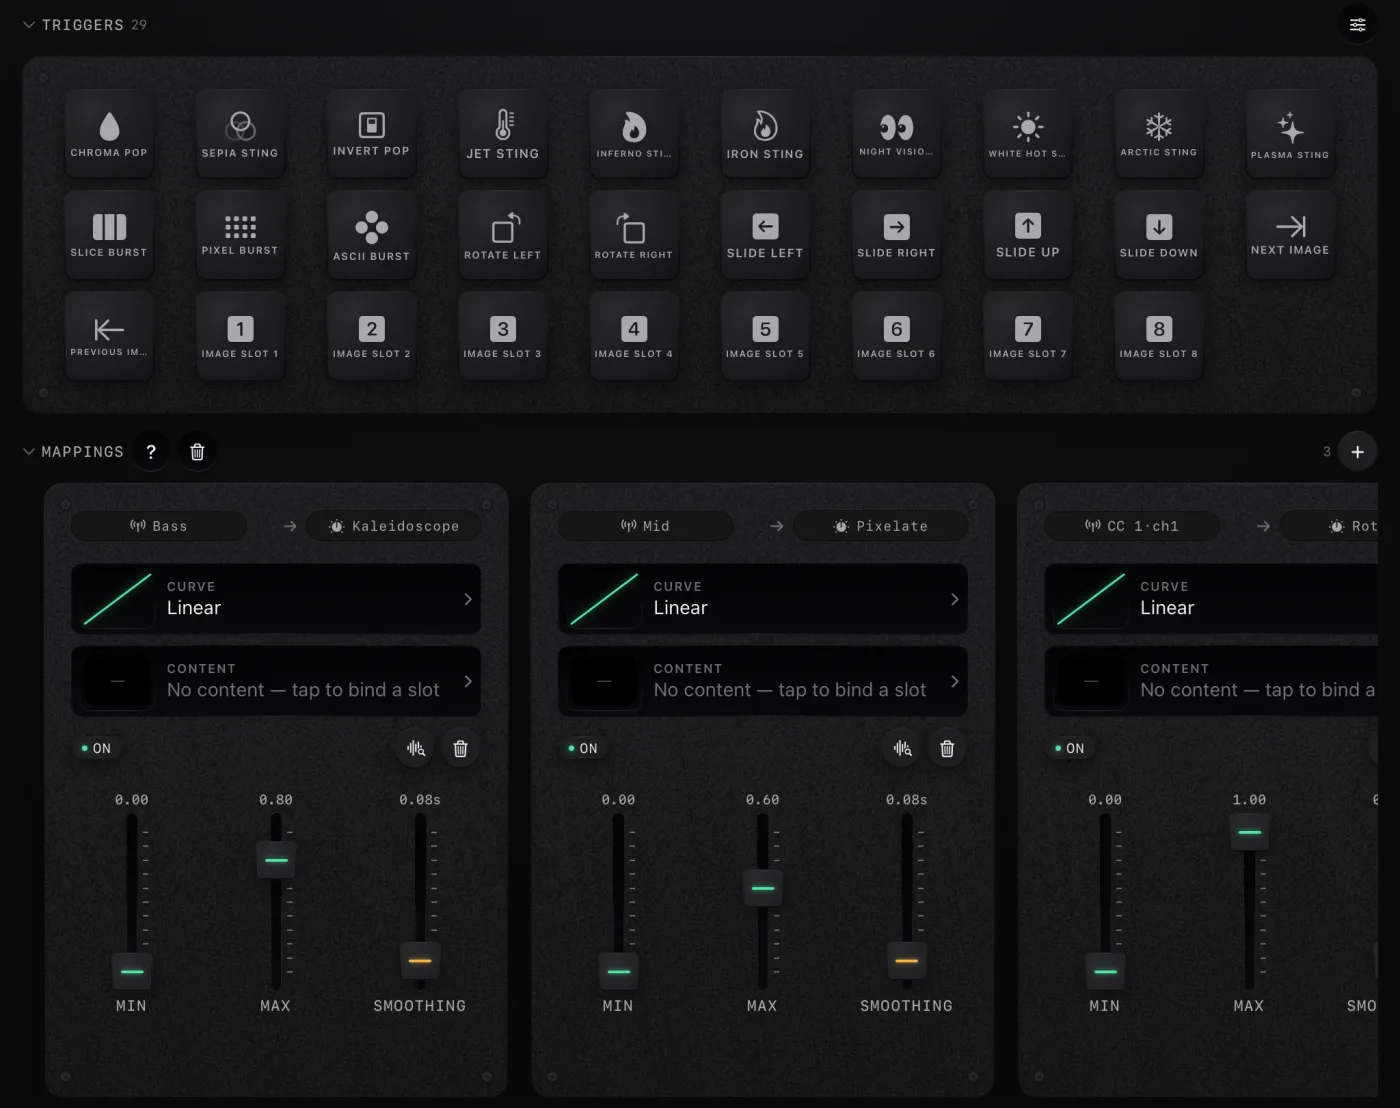
ImmerGround manages complex MIDI topologies through its internal signal bus architecture. The application exposes virtual MIDI In and Out ports to the operating system.
This software-level routing allows other applications running on the same physical device to send MIDI data directly into the visual engine, entirely bypassing physical hardware interfaces. This expands the possibilities for automated and synchronized performances.
On macOS, the built-in IAC (Inter-Application Communication) Driver routes MIDI streams between discrete applications. You enable the IAC bus in the Audio MIDI Setup utility.
You can then run a digital audio workstation like Ableton Live, create a dedicated MIDI track, draw complex automation curves or rhythmic note patterns, and route that track's output directly to the IAC Driver. ImmerGround listens to the IAC bus, receiving the notes and CC data exactly as if they originated from a physical hardware controller.
This mechanism enables tightly sequenced, time-coded visual shows synced perfectly to an audio timeline without requiring loopback cables or secondary computers. On iOS and iPadOS, CoreMIDI handles inter-app routing natively without requiring manual driver configuration.
Applications like AUM, Audiobus, or sequencer apps (such as Patterning or Drambo) target ImmerGround's virtual MIDI In port directly from their internal routing matrices. You can set up an LFO (Low Frequency Oscillator) inside AUM to generate a continuous, rhythmic sine wave of CC data.
Route that specific CC data stream to ImmerGround, map it to a parameter like image zoom or color hue, and the visual will pulse automatically in time with the generated LFO. This modular approach allows you to build custom visual synthesizers using disparate iOS applications.
Routing MIDI out of ImmerGround is also fully supported. While the primary use case involves receiving data to control visual states, the engine can broadcast its internal state changes back out to hardware controllers.
This bidirectional communication allows controllers featuring motorized faders or LED indicator rings (like the Behringer X-Touch Mini) to reflect the current state of a visual parameter accurately. When you load a new scene or trigger a snapshot in ImmerGround, the engine fires a burst of CC values out to the controller, updating the physical hardware LEDs or fader positions to match the active software state.
This prevents parameter jumps when you finally touch a control after a scene change. This virtual port architecture also facilitates network MIDI.
Using Apple's built-in MIDI Network Setup (RTP-MIDI), you can send MIDI data from a Mac running Ableton at front-of-house to an iPad running ImmerGround on stage over a standard Ethernet or Wi-Fi network. The network protocol packages the MIDI commands into UDP packets, transmitting them across the venue.
ImmerGround receives these network packets through its virtual port, allowing remote operators to trigger visuals or adjust parameters without running long, fragile USB cables across the venue floor. Network MIDI introduces some latency depending on switch topology, but provides unparalleled flexibility for large venue installations.
Stage Rigging and Cabling Best Practices
Hardware failure on stage usually originates from cable strain, physical disconnects, or power loss, rarely from actual software crashes. Setting up a robust MIDI control rig requires rigorous attention to physical routing, strain relief, and environmental hazards.
USB cables, particularly the small USB-C and Mini-USB connectors found on MIDI controllers, are fragile. A sudden lateral yank on a cable can snap the connector inside the port, ruining the controller and stopping the visual show immediately.
- Cable strain relief: Secure all cables directly to the desk, stand, or truss. Leave a small loop of slack near the device port to absorb shock. Tape the cable firmly to the surface a few inches away from the actual connection point. If someone trips on the cable, the tension hits the tape barrier, not the fragile device port.
- Gaffer tape application: Use high-quality cloth gaffer tape (such as Pro-Gaff) to secure long cable runs to floors, walls, and tables. Never use standard duct tape; it leaves a permanent, sticky residue that destroys rubber cable jackets and ruins equipment finishes.
- Right-angle connectors: Replace straight USB cables with right-angle variants for controllers placed closely together on a crowded table. Right-angle connectors reduce the physical footprint of the gear and direct the cable path parallel to the device edge, significantly minimizing snag hazards from passing hands or clothing.
- Cable length limitations: Standard passive USB cables reliably transmit data up to roughly 15 feet (4.5 meters). If you need to position your MIDI controller further from the main processing iPad or Mac, utilize active USB repeaters, powered hubs, or dedicated USB-over-Ethernet extenders. Passive cables longer than 15 feet suffer from voltage drop and signal degradation, which will drop MIDI packets, leading to missed note triggers or stuck visual faders.
- Ground loop isolation: Audio and video gear sharing power circuits often develop an audible 60Hz ground hum. While the original 5-pin DIN MIDI standard specifies optical isolation to prevent this, modern USB connections tie the device grounds together directly. If connecting your USB MIDI controller causes a hum in the venue's audio PA system, insert a dedicated USB ground loop isolator inline between the controller and the USB hub to break the electrical ground path while passing the data.
- Redundant power paths: Secure the physical connection of your power delivery adapter. Use a small zip tie to lock the USB-C power cable to the hub body, ensuring it cannot vibrate loose during bass-heavy performances. If the hub loses wall power, the iPad will attempt to run the entire rig off its internal battery, which often triggers an immediate over-current shutdown of the USB ports.
Organize your physical setup into discrete, secure blocks. Mount the iPad or Mac and the primary USB hub securely on a dedicated, weighted stand out of the immediate spill zone for drinks.
Route the heavy, long display and power cables down the stand leg. Place only the tactile MIDI controllers on the performance table.
This physical separation protects the core processing unit and the delicate hub connections while keeping the durable control surfaces accessible to the performer. Label every cable end with white tape and a sharpie.
In a dark club environment, tracing a dead connection through a pile of black cables wastes critical time. Mark the power delivery cable, the HDMI output, and each specific MIDI controller run.
Carry exact duplicates of every critical cable in your bag. A $10 USB-C cable failure will ruin a gig just as thoroughly as a broken iPad, and having immediate replacements is the only defense against mid-show technical disasters.
Where to get free visual tools
Before configuring a complex physical hardware rig and purchasing controllers, you can test your MIDI workflows, verify routing, and establish your visual style using our suite of free resources. We provide lightweight, web-based utilities to help you map, test, and perform without requiring immediate software purchases or complex installations.
These tools simulate the core logic of the ImmerGround engine directly in your web browser.
- Visualizer: Access our browser-based render engine at /visualizer to test your camera feeds, apply basic shaders, and map your connected MIDI controllers directly through the WebMIDI API. This allows you to confirm that your hardware functions correctly before configuring the native application.
- BPM Finder: Tap out the tempo of a live audio track using the /tools/bpm-finder to manually sync your visual pulses, LFOs, and clip triggers to the music. Understanding tempo mapping is essential for accurate rhythm-based visual triggers.
- MIDI Tester: Verify your controller's physical connection, log incoming note values, check CC ranges, and debug routing issues in the browser with the /tools/midi-tester utility. Use this to ensure your hardware outputs the correct hex values and channels.
- Video Loops: Download a starter pack of high-contrast, VJ-ready video clips from /loops to load into your triggering banks and begin mapping pads to specific visual files immediately. These optimized files guarantee smooth playback during intensive multi-layer mixing.
What to do next
With your hardware connected, mapped, and verified, you are ready to construct a complete performance set. Follow these detailed steps to build a reliable, performable show file that withstands the rigors of live stage use.
- Launch ImmerGround on your target device and connect your main USB-C hub, ensuring the high-wattage power delivery adapter is plugged into a reliable, isolated wall outlet.
- Plug your chosen MIDI controllers into the hub ports and verify they illuminate, indicating successful USB bus power negotiation with the host operating system.
- Open the MIDI Learn panel in the application interface and map your essential controls: assign the grid pads to specific clip triggers and the linear faders to layer opacities, color shifts, or master output fades.
- Establish your default visual state. Ensure all faders are at their starting positions and all initial clips are loaded into memory.
- Save the current software configuration as a master template file to prevent data loss. Lock this file to prevent accidental overwrites during rehearsal.
- Test the entire system under load by rapidly firing multiple pads and sweeping several faders simultaneously. Observe the frame rate counter to ensure the USB hub processes the dense MIDI data stream without dropping frames, stalling the render engine, or causing visual stutters.
- Rehearse your set in total darkness. Ensure you can navigate the tactile layout of your MIDI controllers purely by muscle memory, as stage lighting often obscures physical labels.
- Document your cable patching diagram. Take photos of your working hub connections and store them in your gig bag to accelerate setup times at future venues.
Following this hardware preparation sequence guarantees a stable, responsive visual performance system. Relying on class-compliant CoreMIDI protocols and robust physical cabling ensures that when you push a fader on stage, the visual engine responds instantly, maintaining the critical link between performer intent and audience experience.